Plan the week on the load calendar
The calendar lays loads out by day, so you can see the week at a glance and move loads between days.
Watch this in the video (3:06)
Steps
In the pictures, a numbered red box marks where to click or type. Where a picture has more than one box, the numbers give the order.
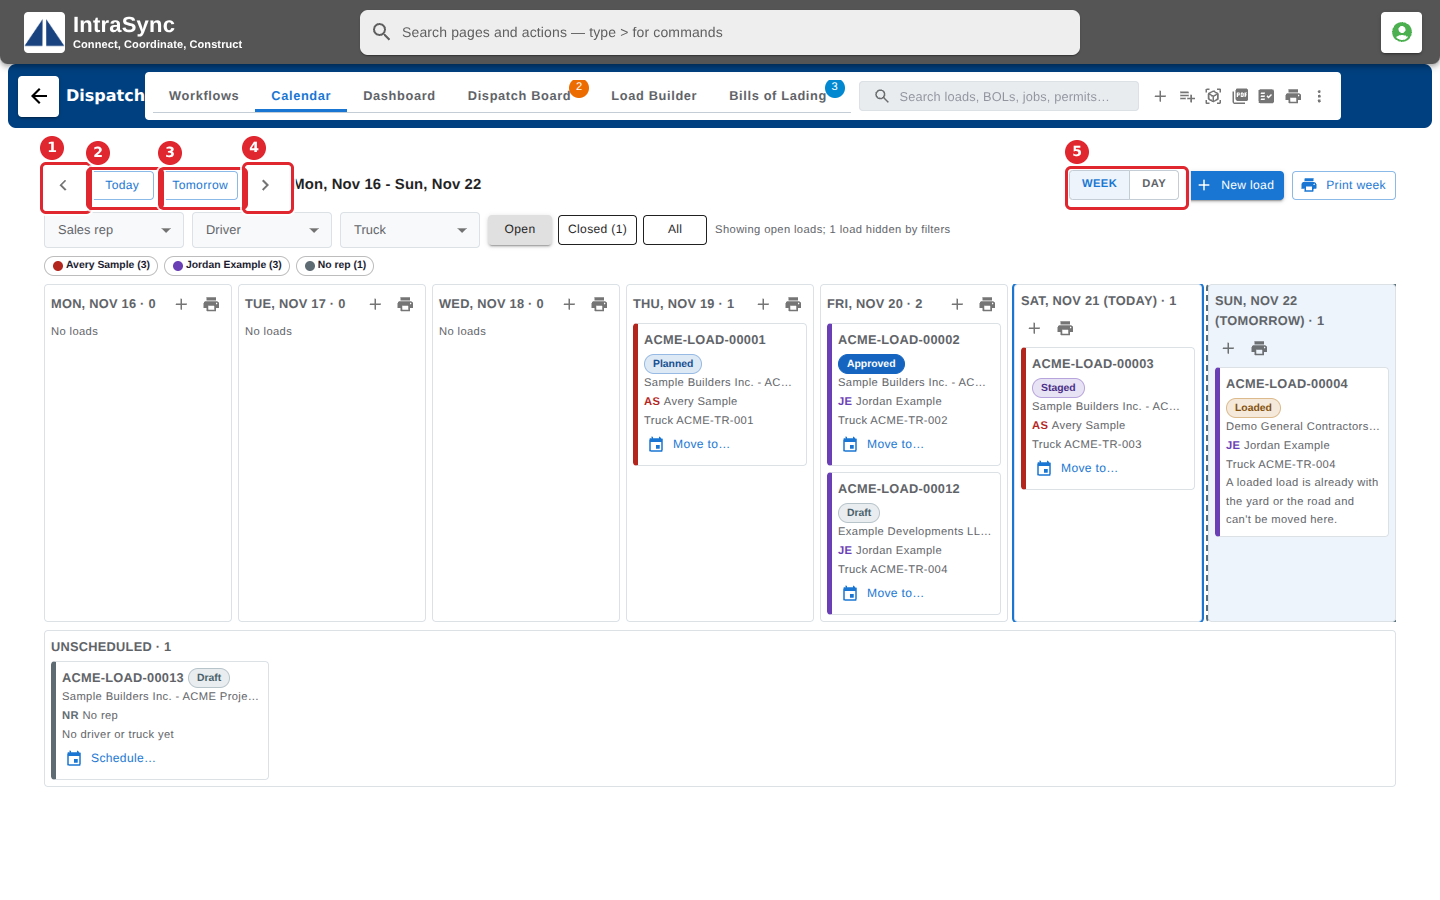
Select the Calendar tab. Use Previous and Next to change week and Today to come back. Tomorrow shows tomorrow's loads alone, for staging. Choose Week or Day.
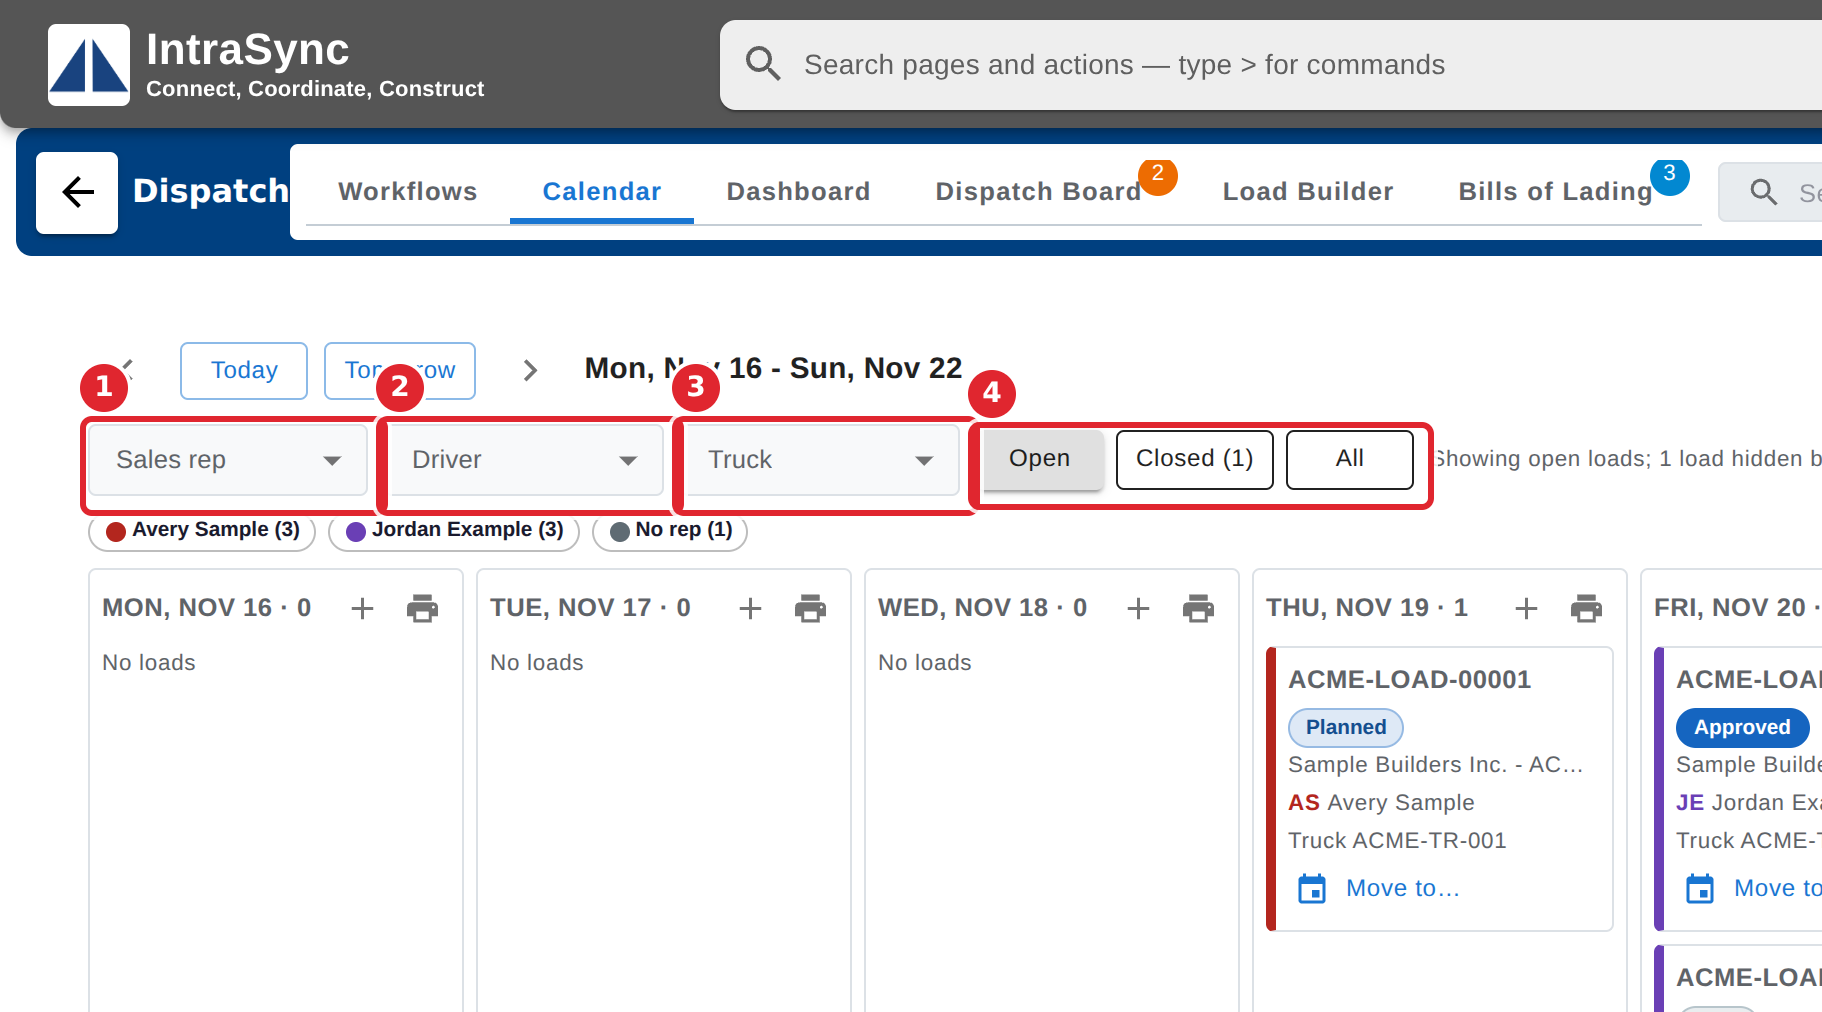
Narrow the calendar by sales rep, driver or truck, and choose Open, Closed or All loads.
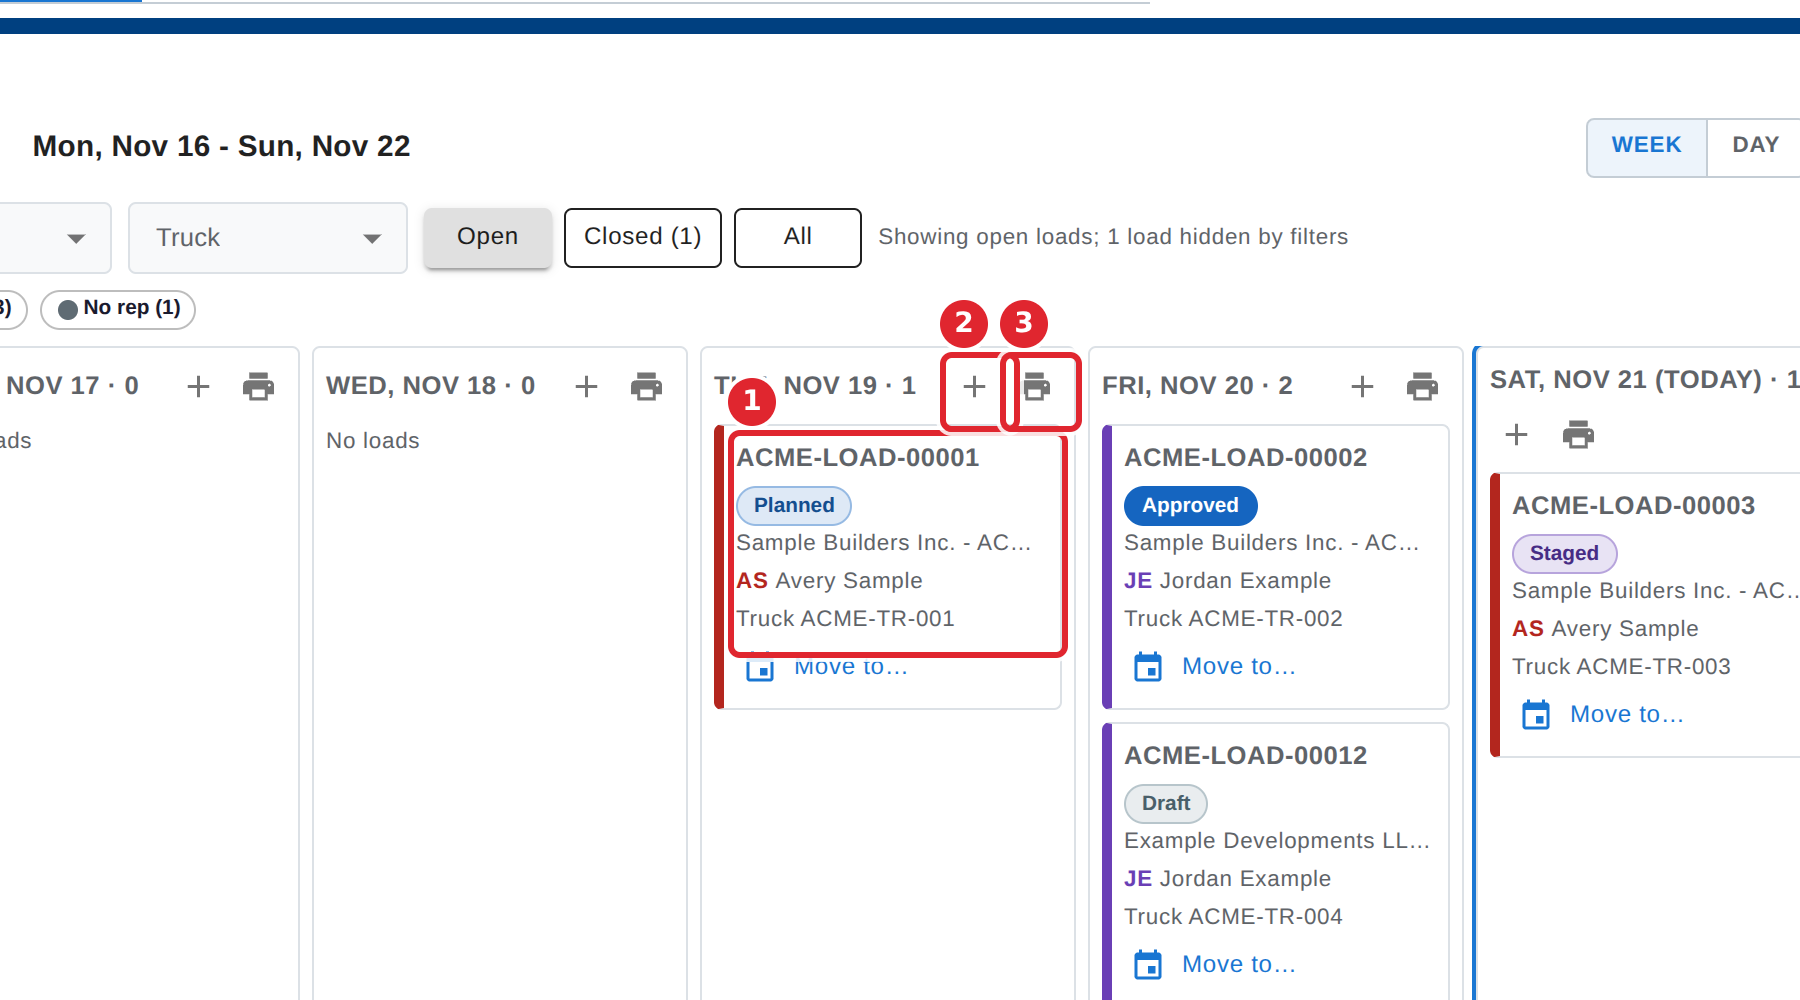
Each day lists its loads. Select a load to open it. The plus starts a new load on that day, and the printer prints that day's tickets.
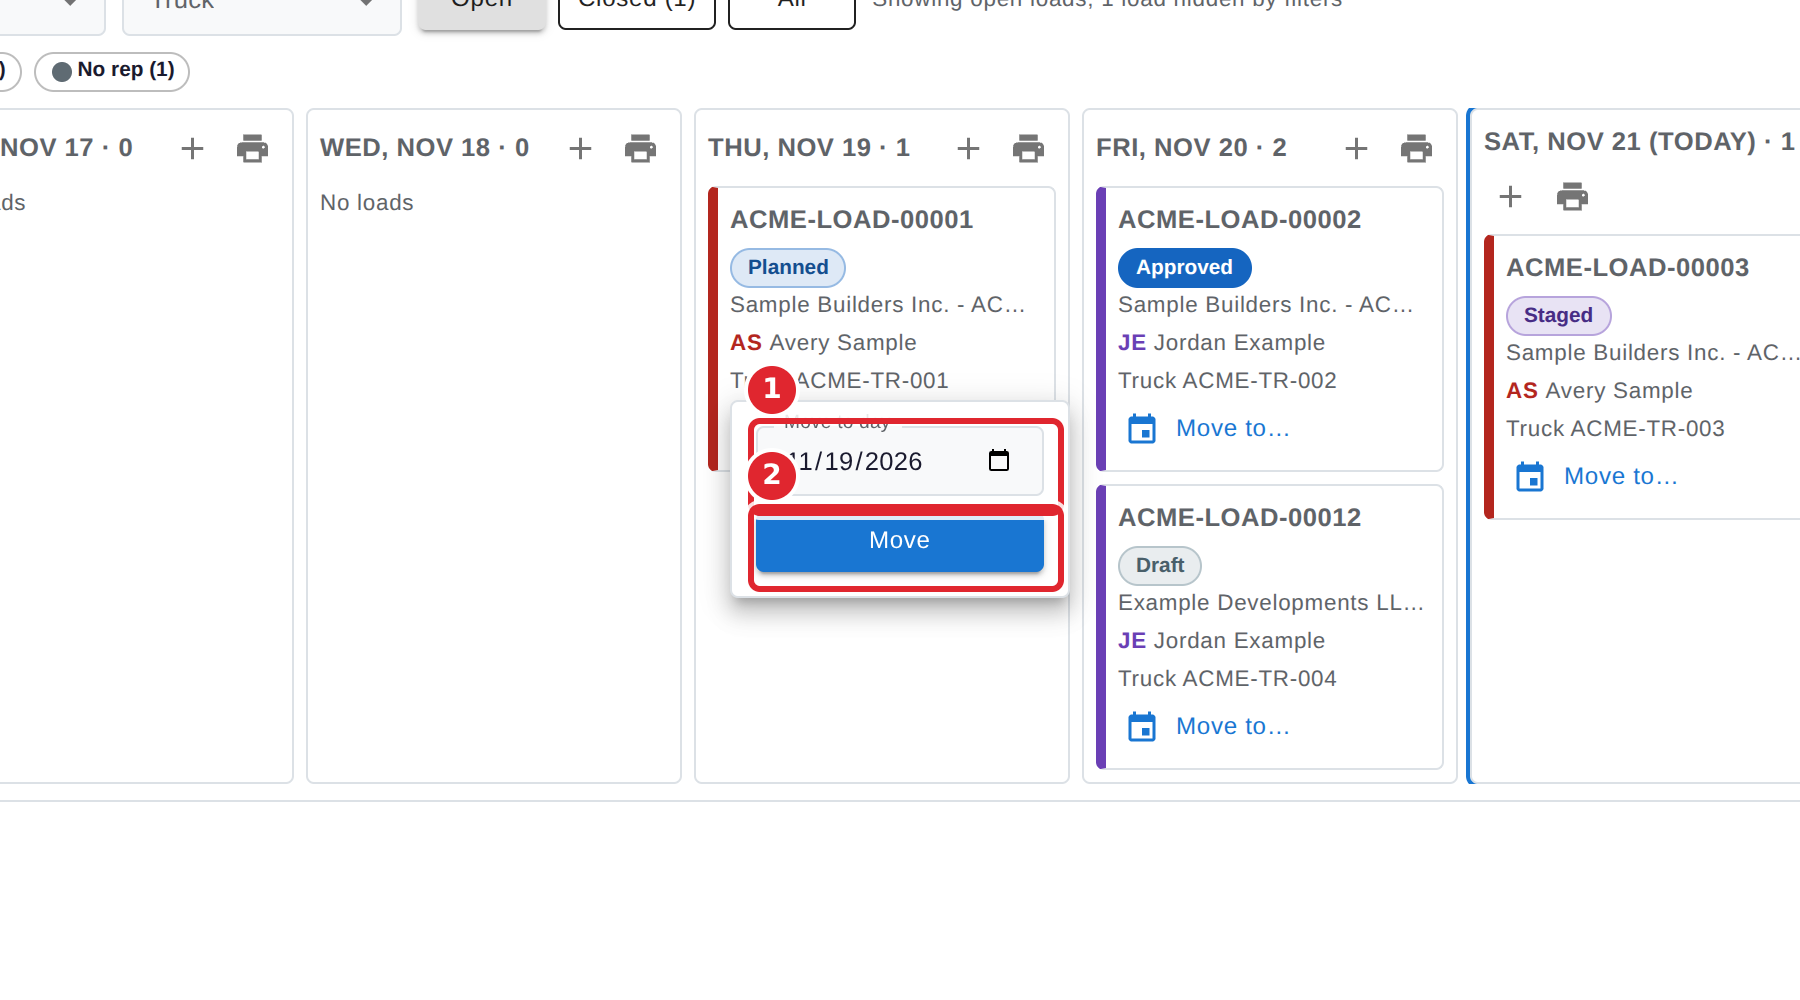
To move a load to another day, select Move to… on the load, choose the day, and select Move. In the Week view you can also drag the load to another day.
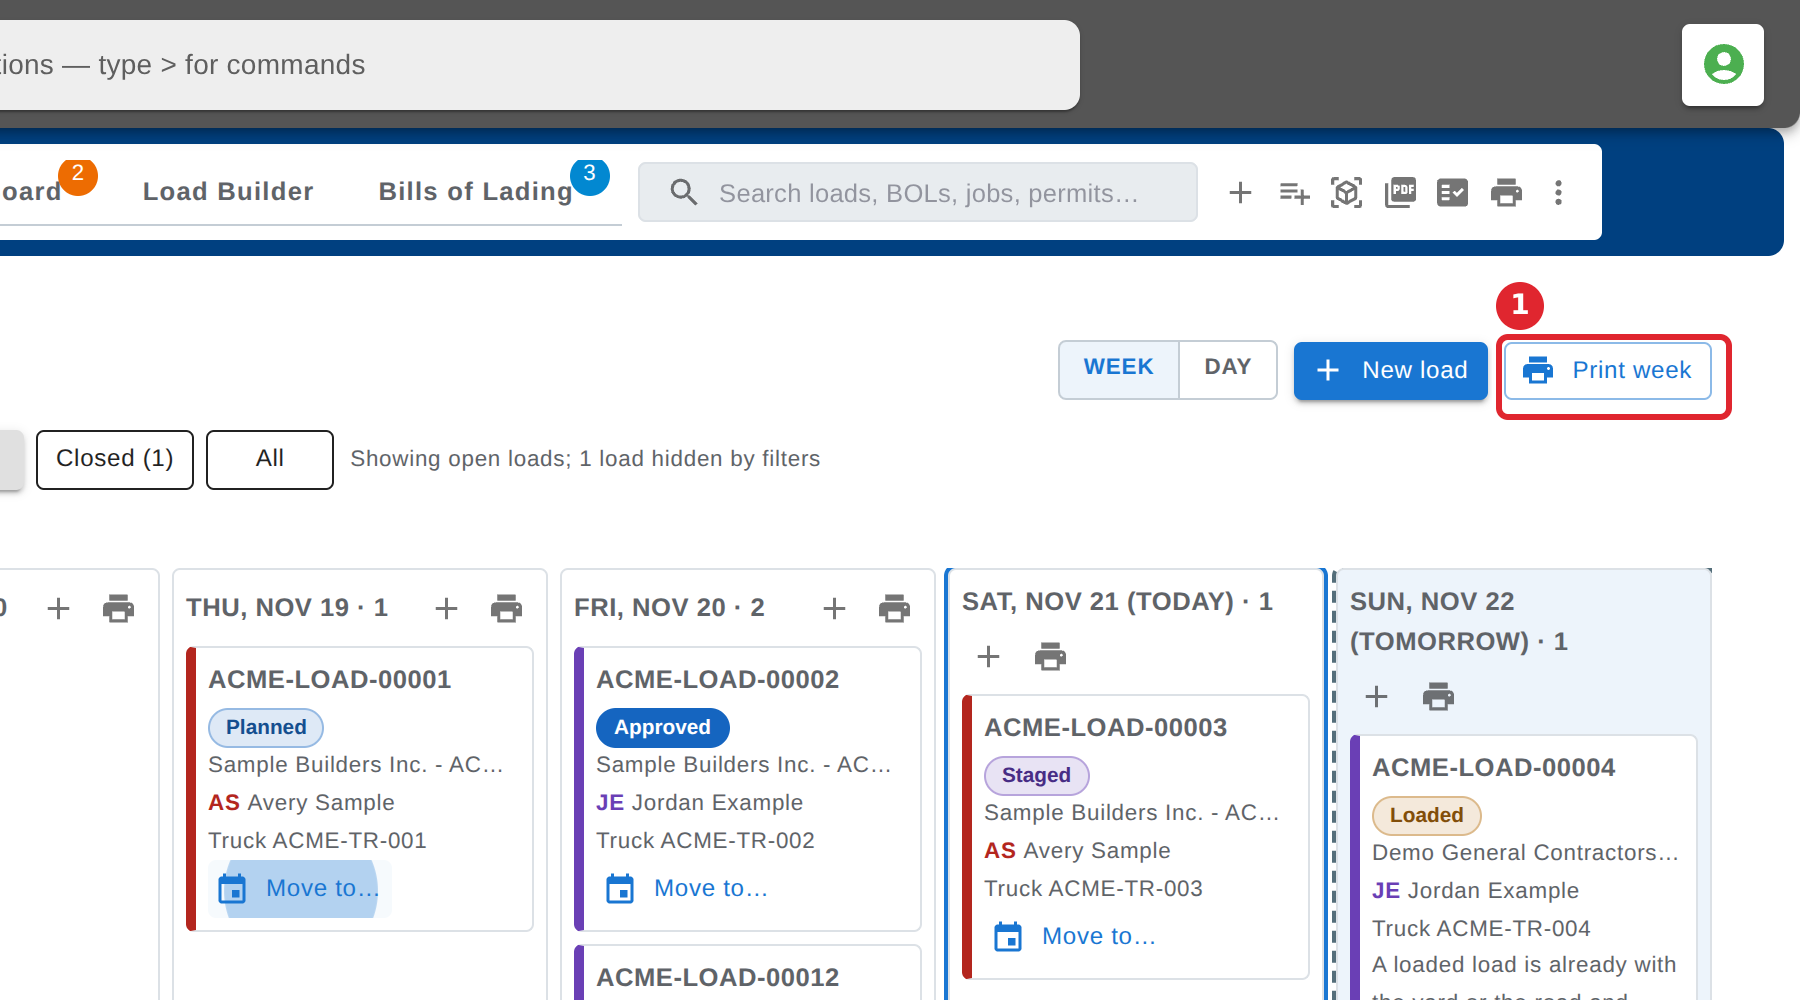
Select Print week to print the week as a PDF.
Tips
- Only loads that have not reached the yard or the road can be moved: Draft, Planned, Approved and Staged.
- If someone else changed a load while you were moving it, Dispatch does not move it and tells you. Look again, then retry.
- Loads with no date wait under Unscheduled, below the week. Select Schedule… on one to give it a day.