Type a schedule of values on the screen
Set up a job's schedule of values when it exists nowhere else yet, without preparing an Excel file.
Watch this in the video (2:49)
Before you start
- Schedule of Values is turned on for your company.
- Only an administrator can change Settings > Module Features.
Steps
In the pictures, a numbered red box marks where to click or type. Where a picture has more than one box, the numbers give the order.
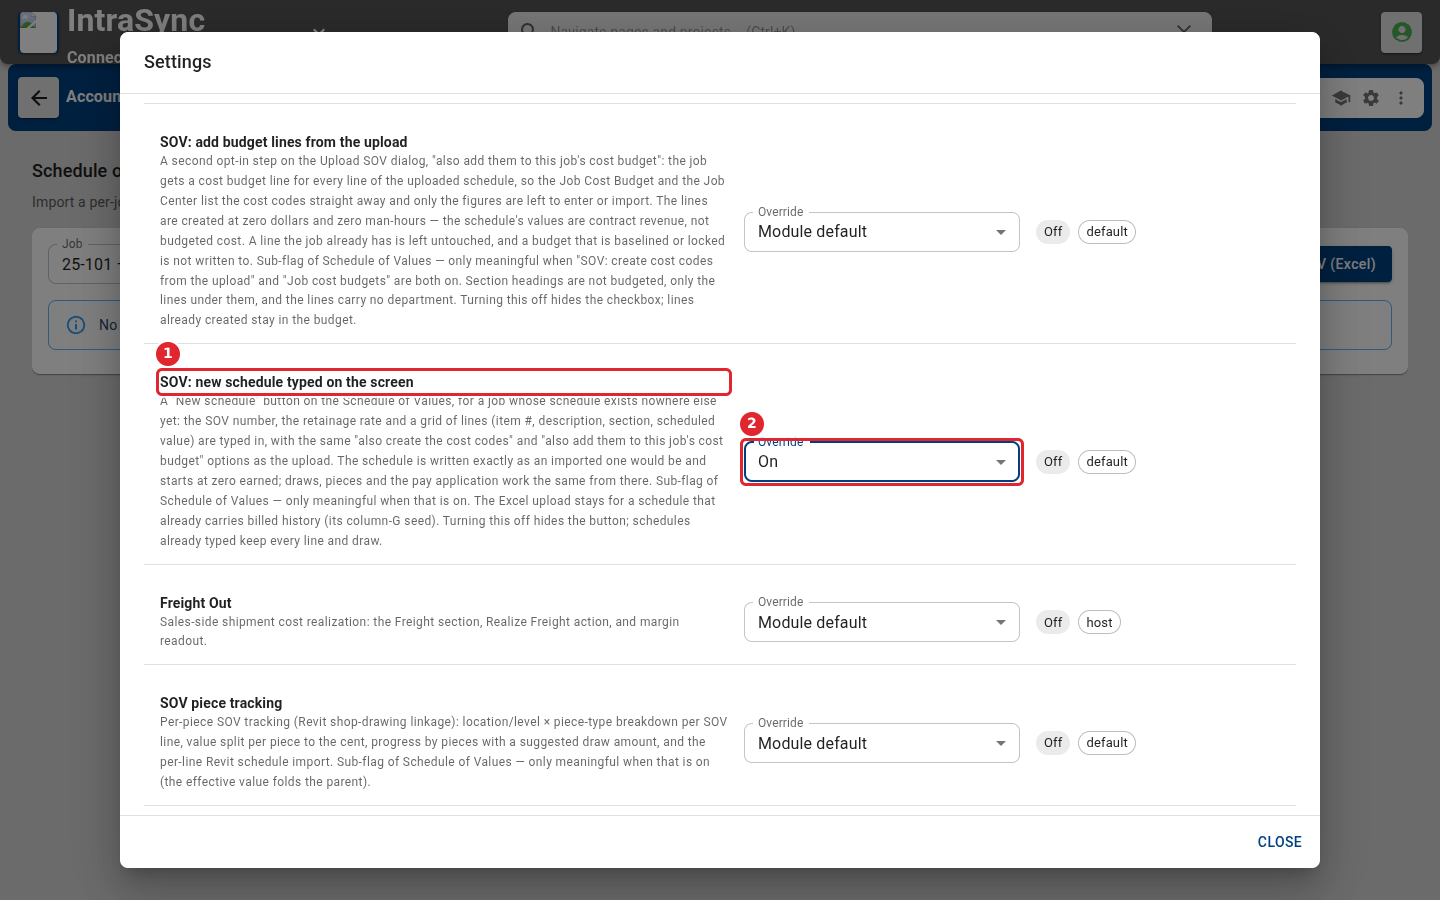
Open Settings > Module Features, select Sales / AR, and set SOV: new schedule typed on the screen to On. Then select Save Module Features.
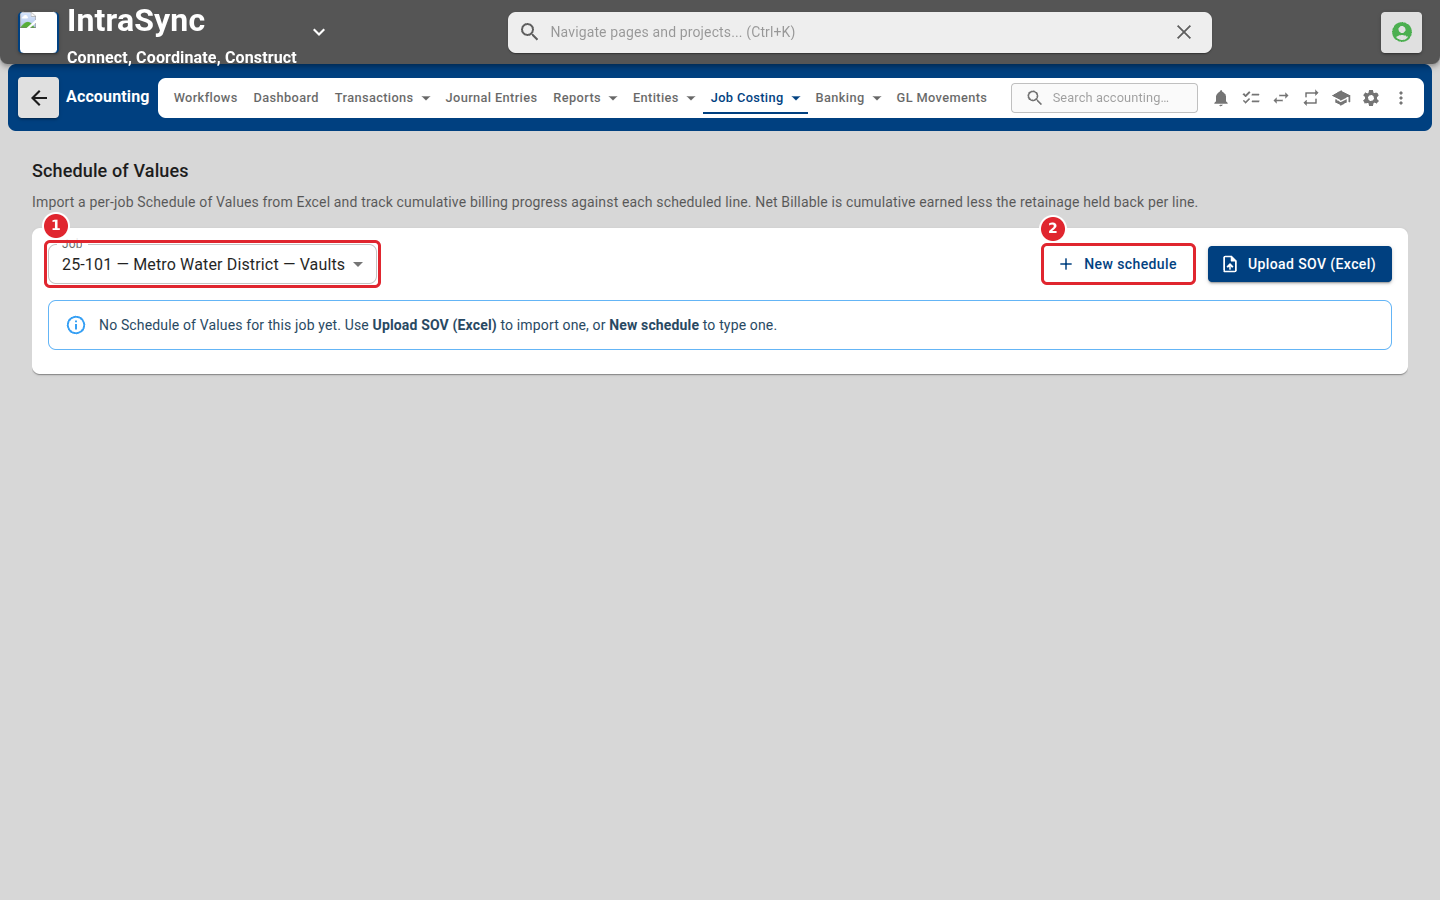
Select Job Costing > Schedule of Values, choose the job, then select New schedule.
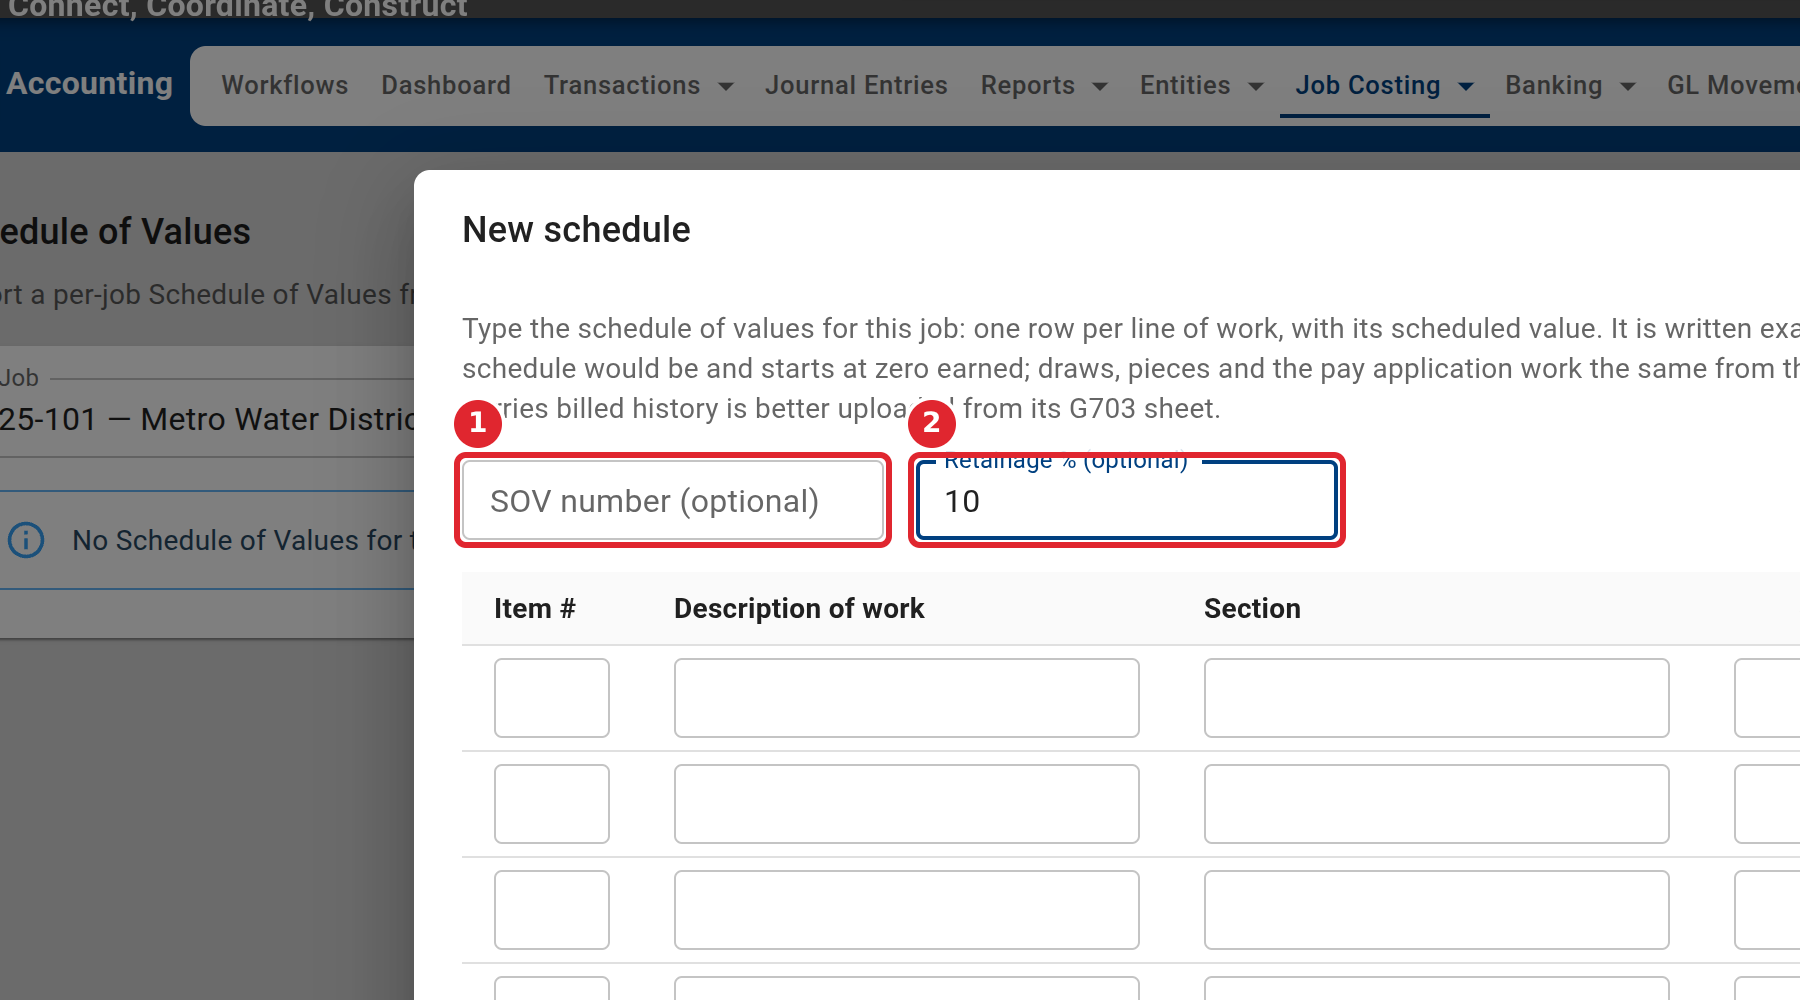
Enter the schedule's number and its retainage percent, if it has them. Both are optional.
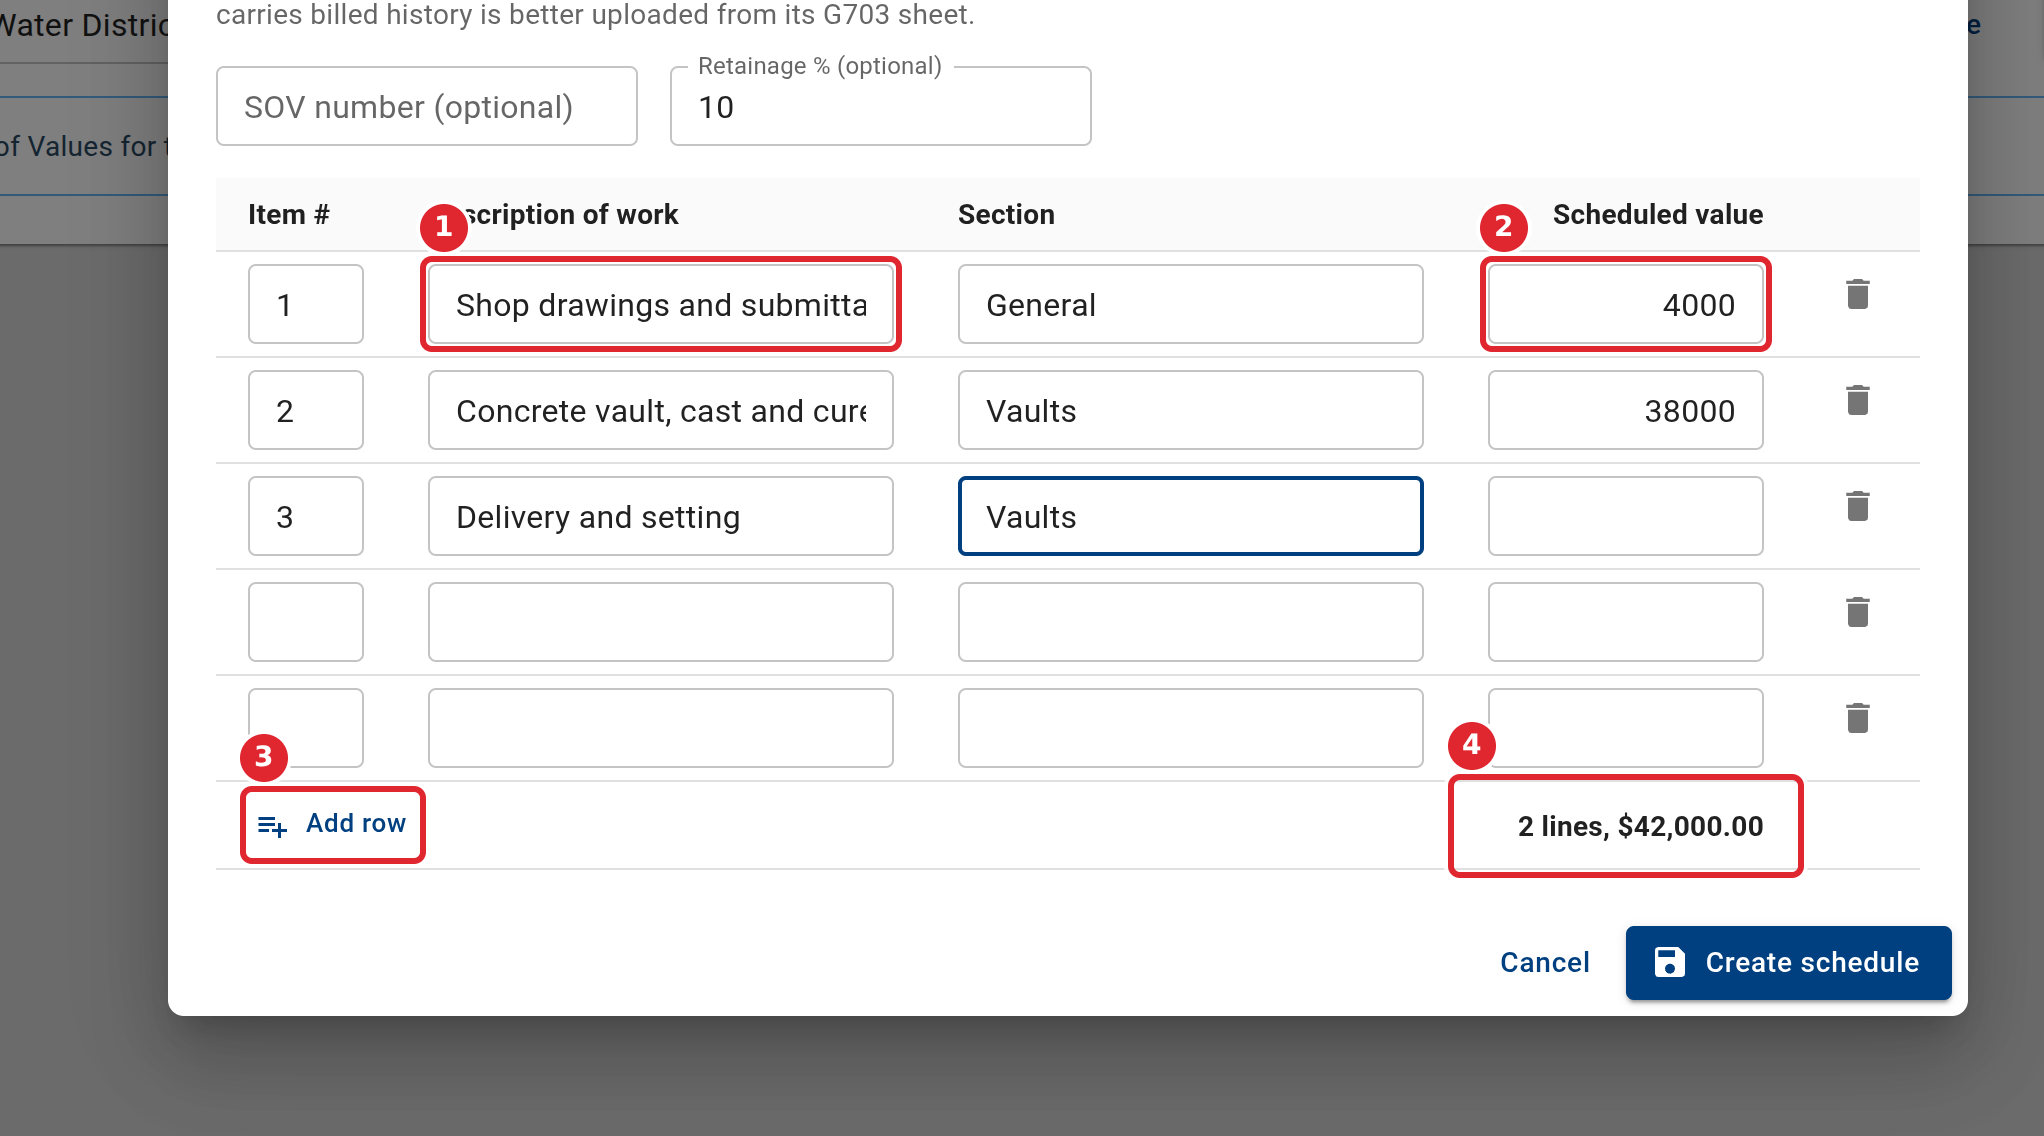
Type one line per row: its item number, the description of the work, its section and its scheduled value. Select Add row for more lines. The total is under the grid.
If something is missing or out of range, Create schedule saves nothing. Each problem is listed above the buttons, with the row it is on, and the field is marked in the grid.
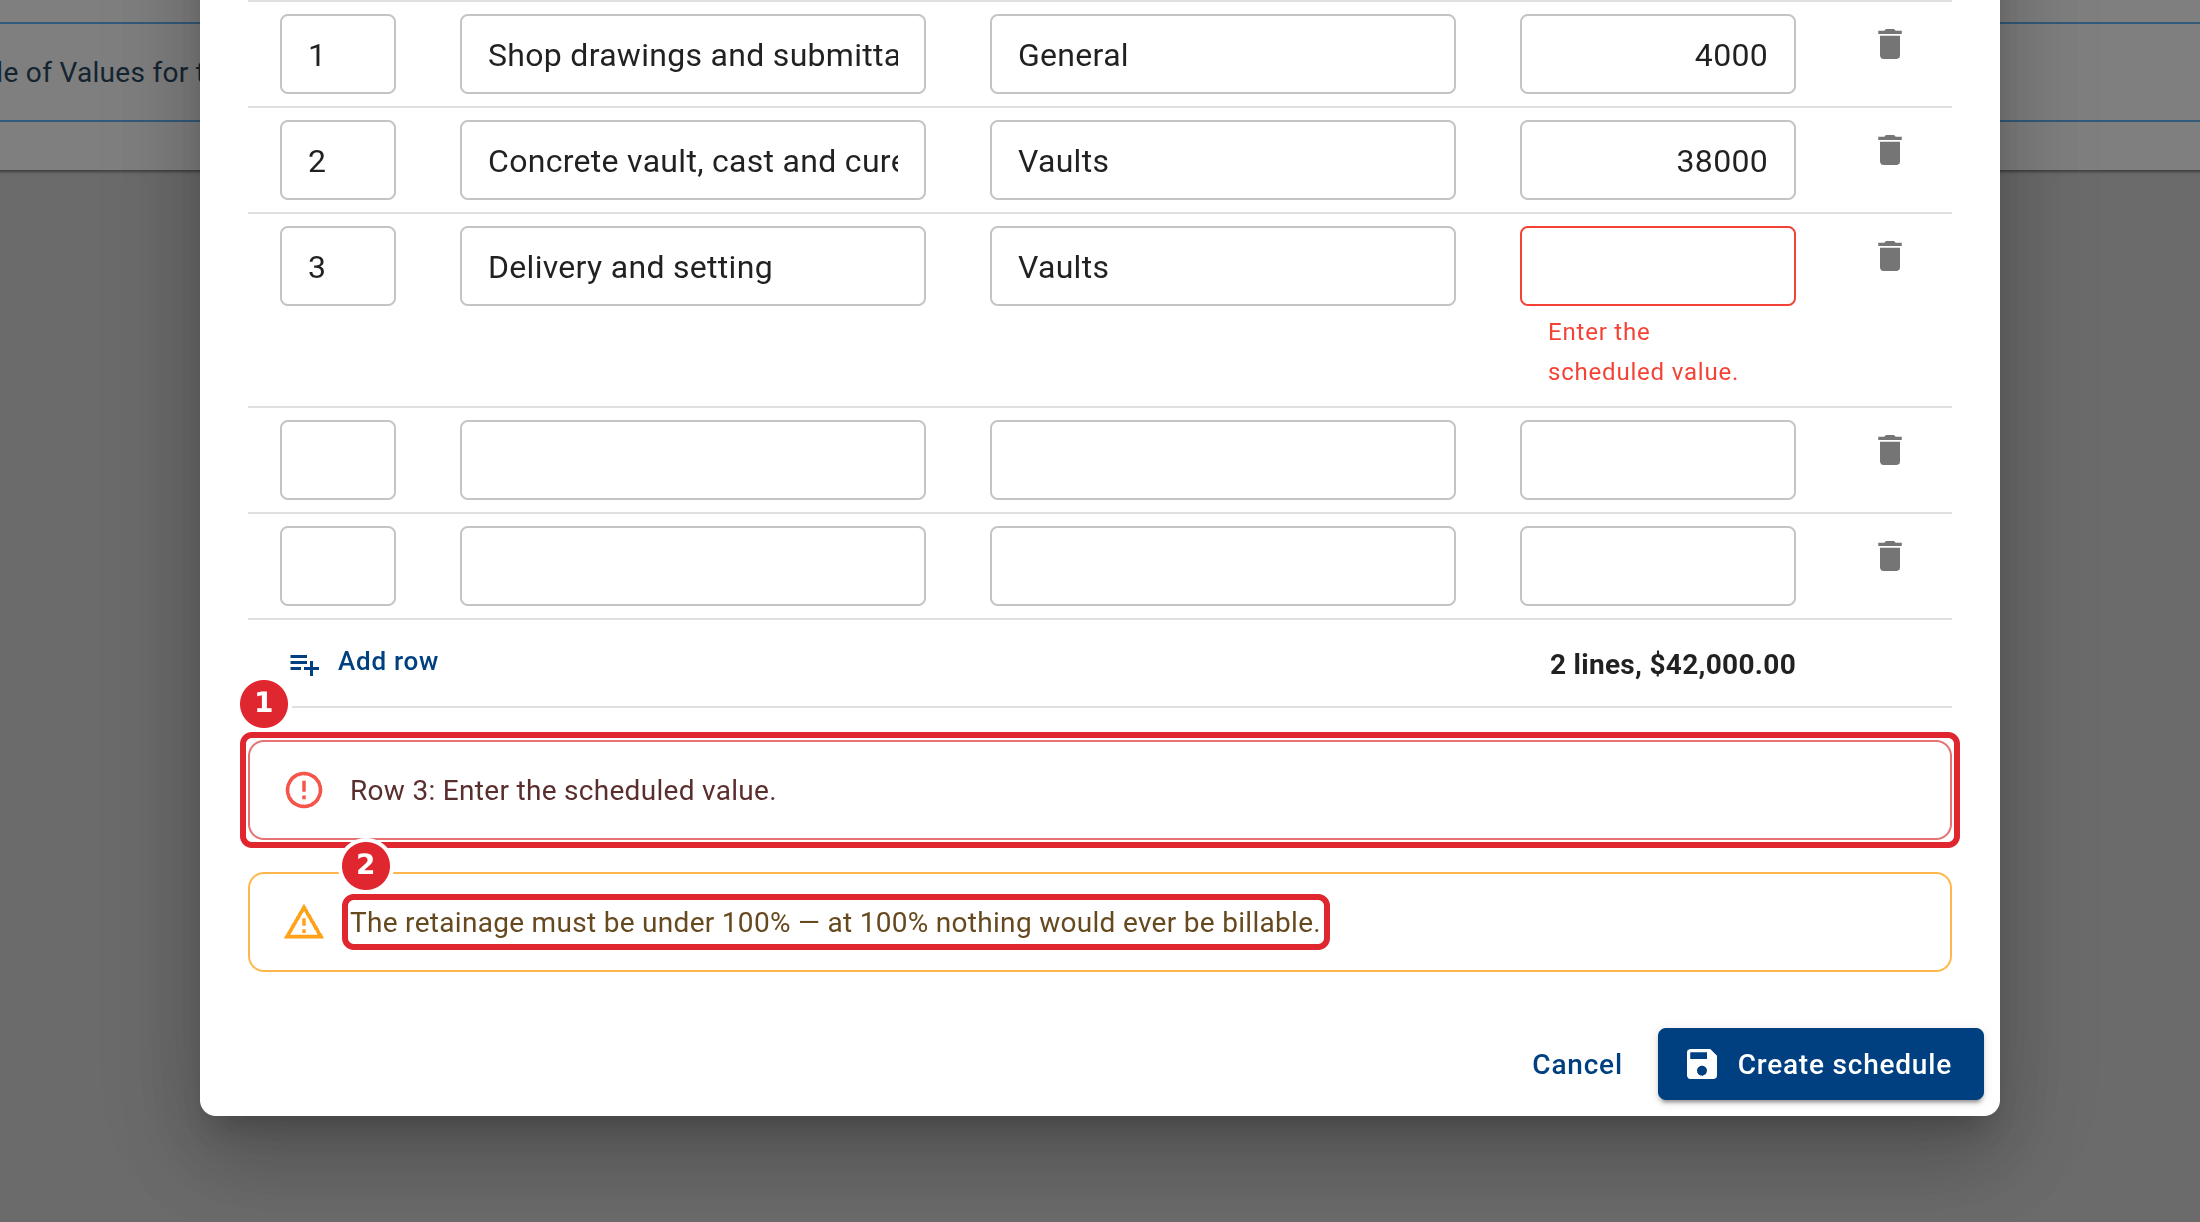
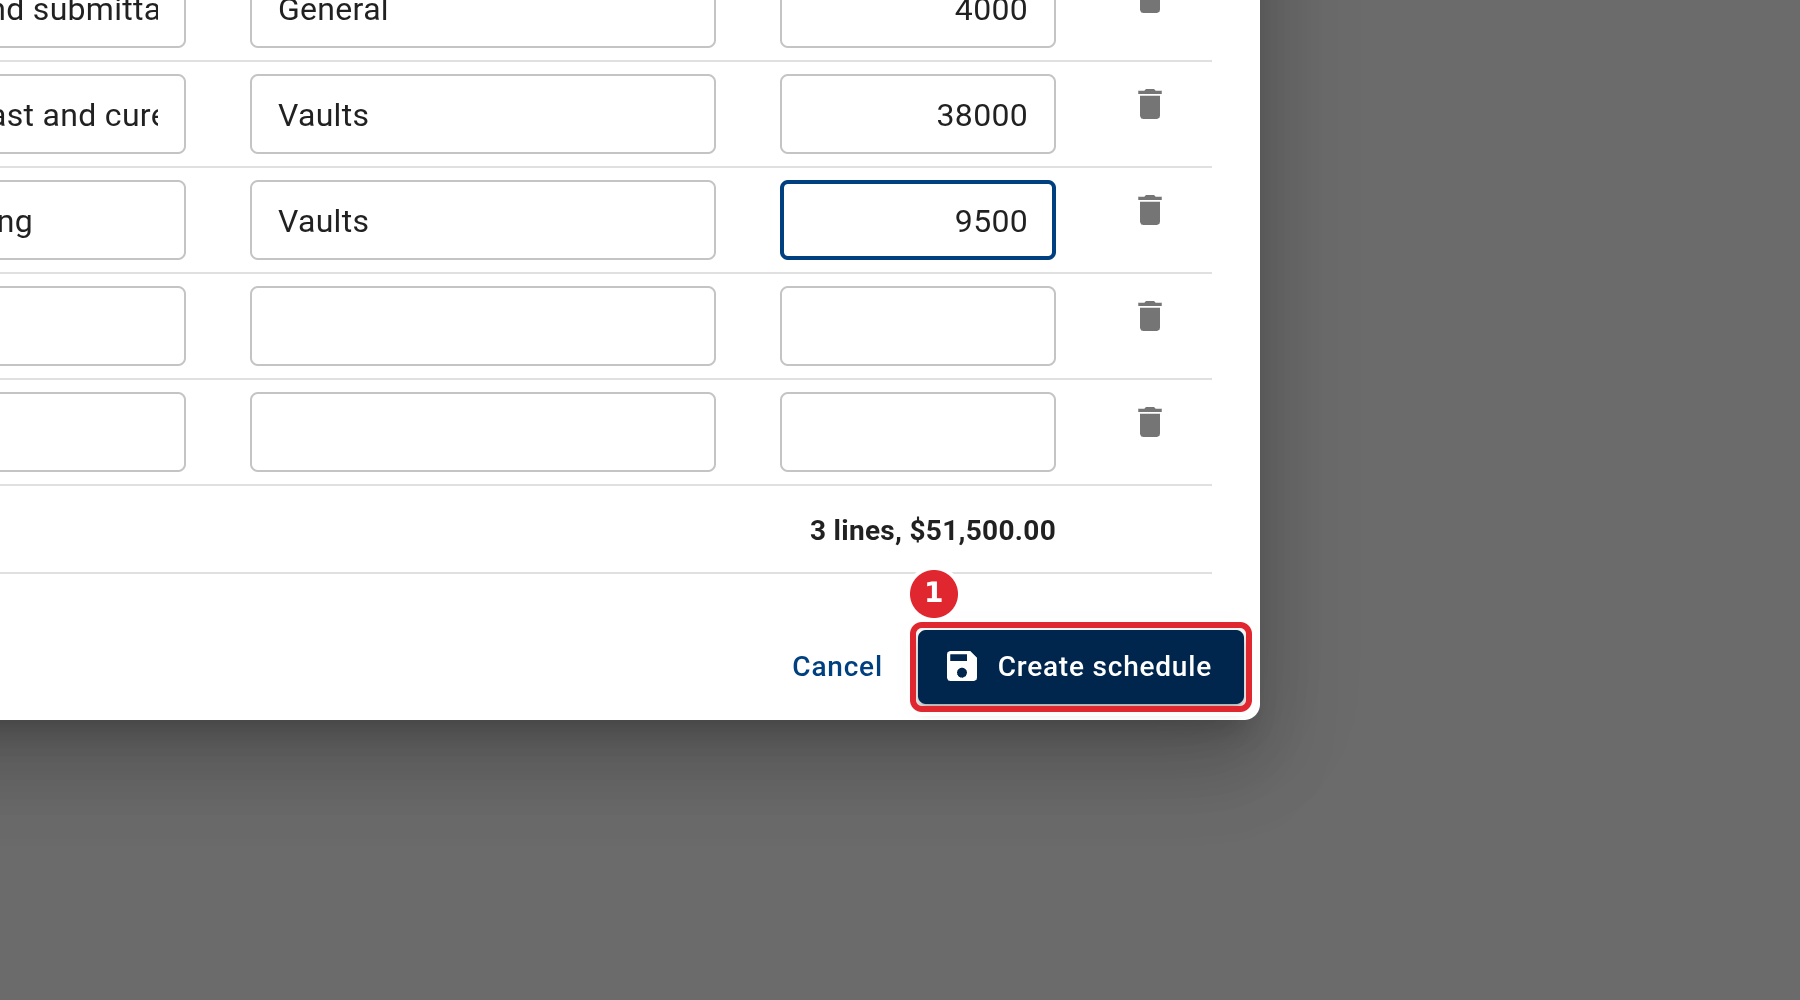
Correct each problem, then select Create schedule again.
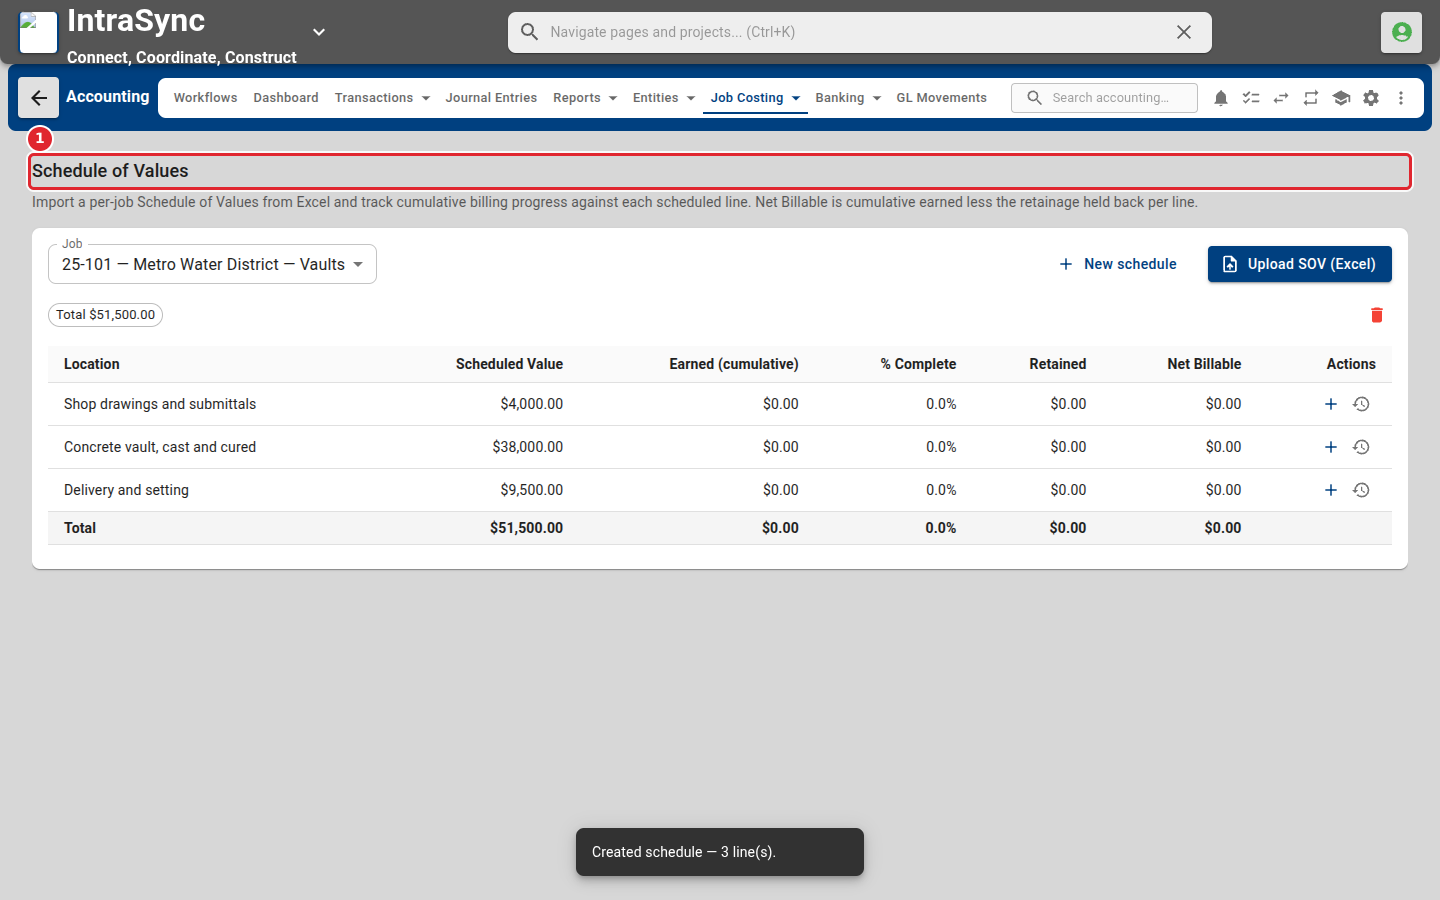
The schedule appears with its lines, ready to record progress against them.
Tips
- Each line needs a description and a scheduled value greater than zero, typed as dollars and cents.
- A description can appear only once in each section.
- Retainage is a percent under 100, typed as 10 or 10%. Leave it blank for none.
- A description or a section can be up to 255 characters long, and an item number or the SOV number up to 50.
- A section typed on a row with no description or value is flagged. Type the section on each line it heads instead.
- A schedule with no SOV number is listed as Typed schedule with the date it was created.
- For a schedule that already has billing history, use Upload SOV (Excel) instead.