Create a new estimate
Start an estimate by hand for work that did not come from a takeoff or a drawing.
Steps
In the pictures, a numbered red box marks where to click or type. Where a picture has more than one box, the numbers give the order.
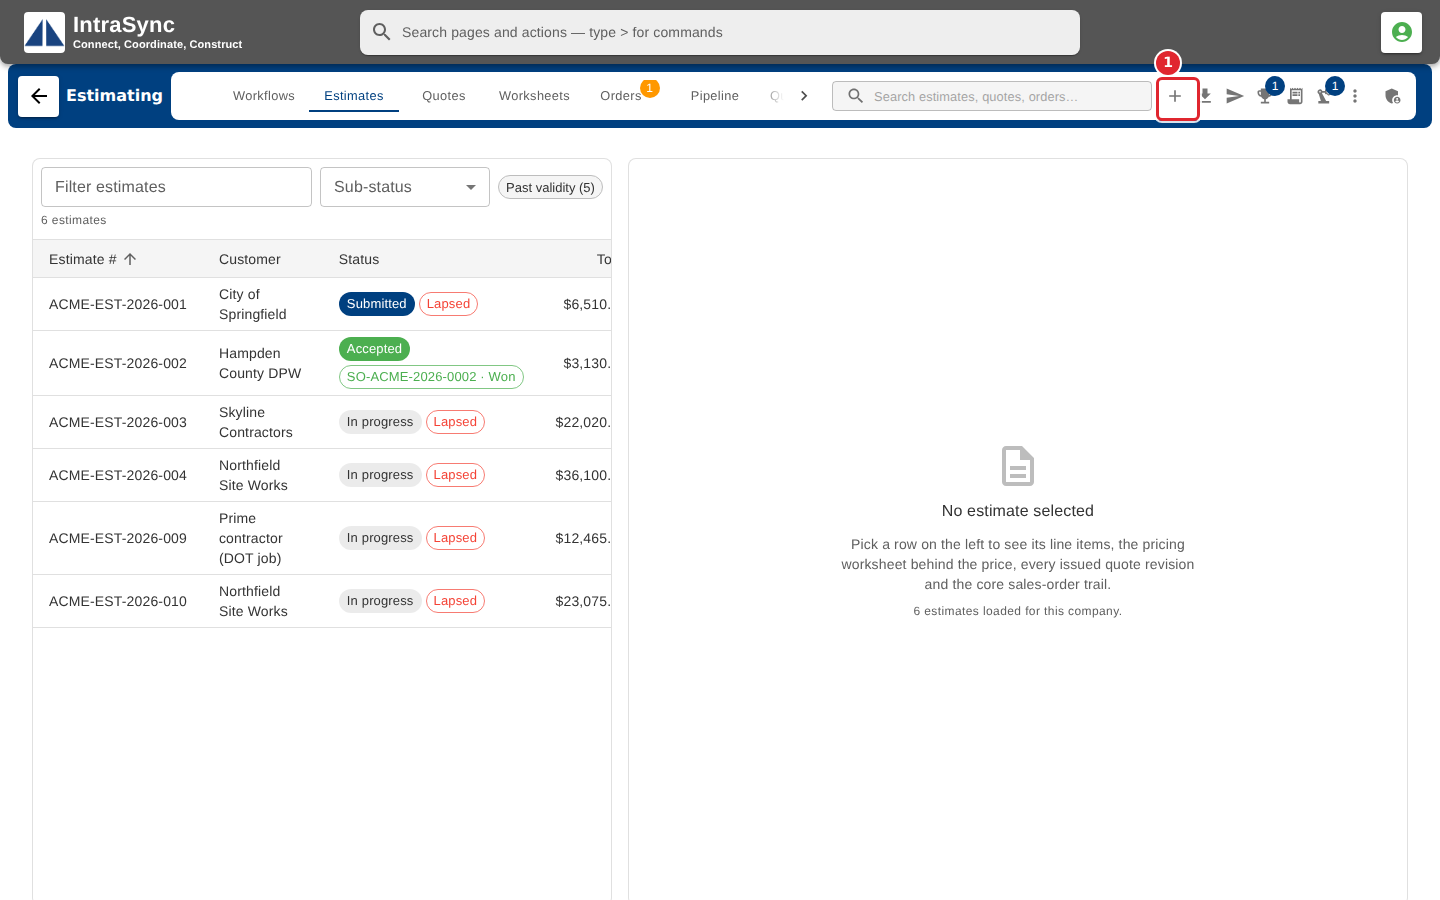
Select New estimate in the hub header, or the Build an estimate card on the Workflows tab.
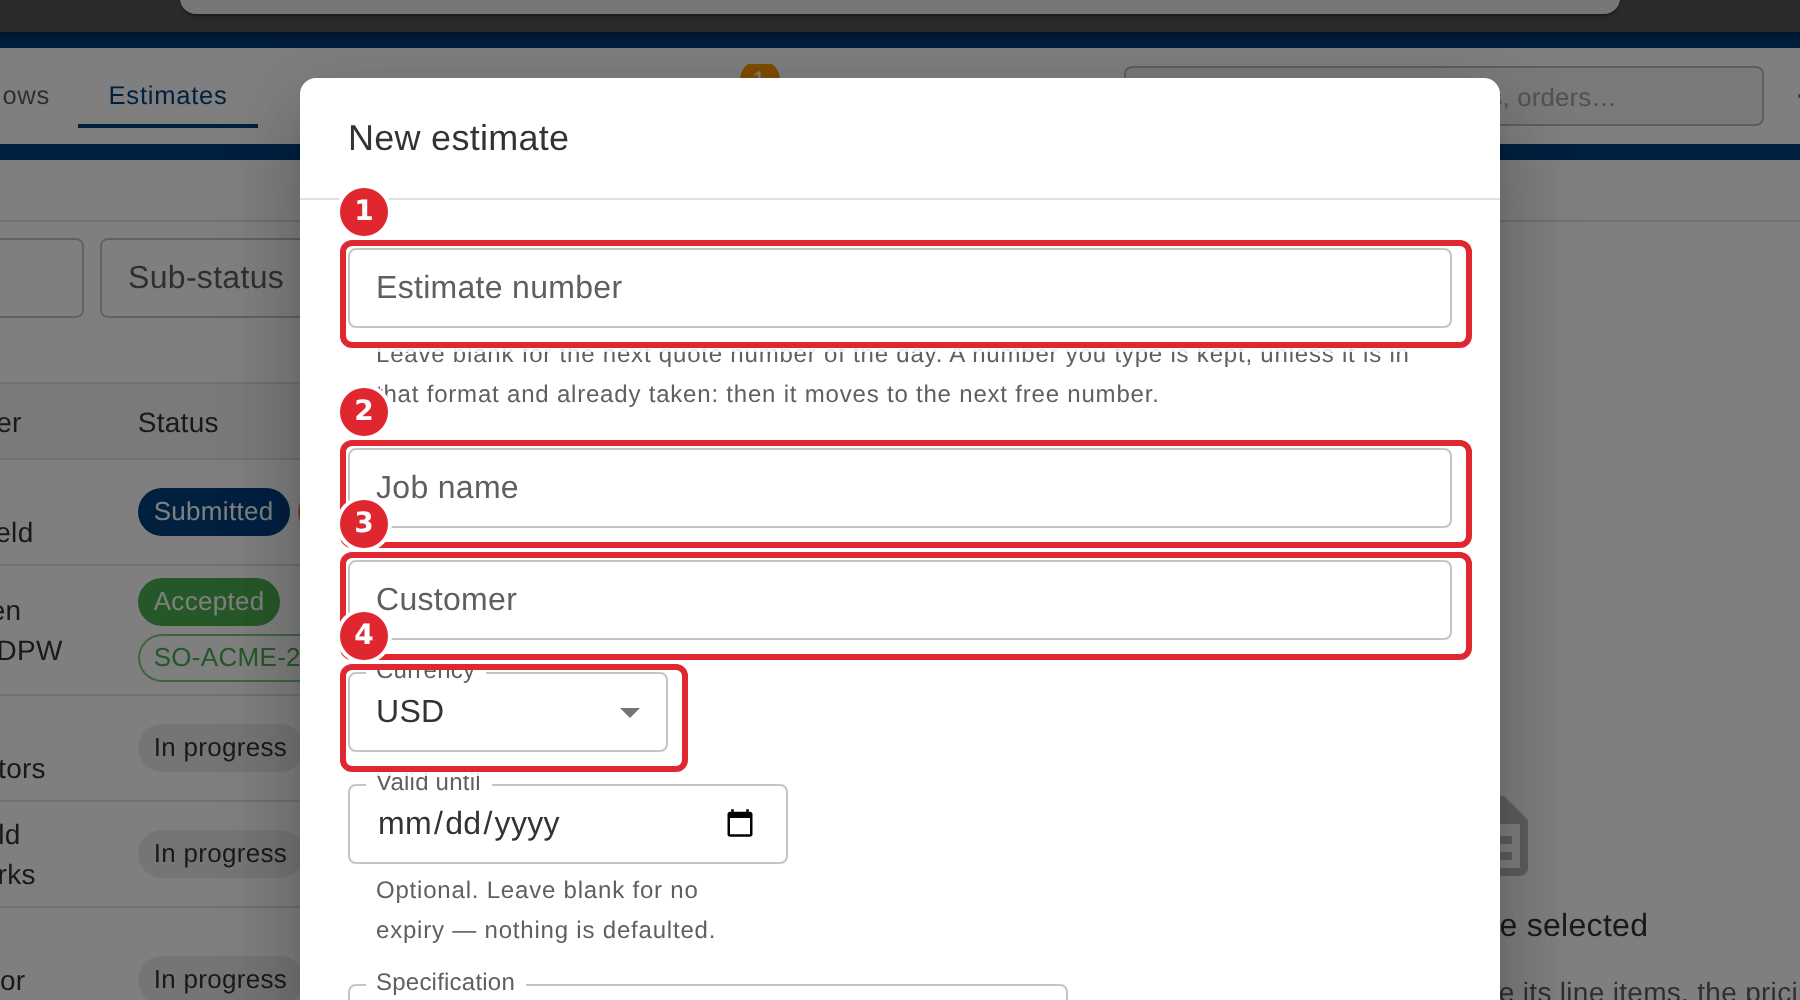
Leave Estimate number blank to take the next quote number of the day, or type your own. Then fill in the job name and the customer, and choose the currency.
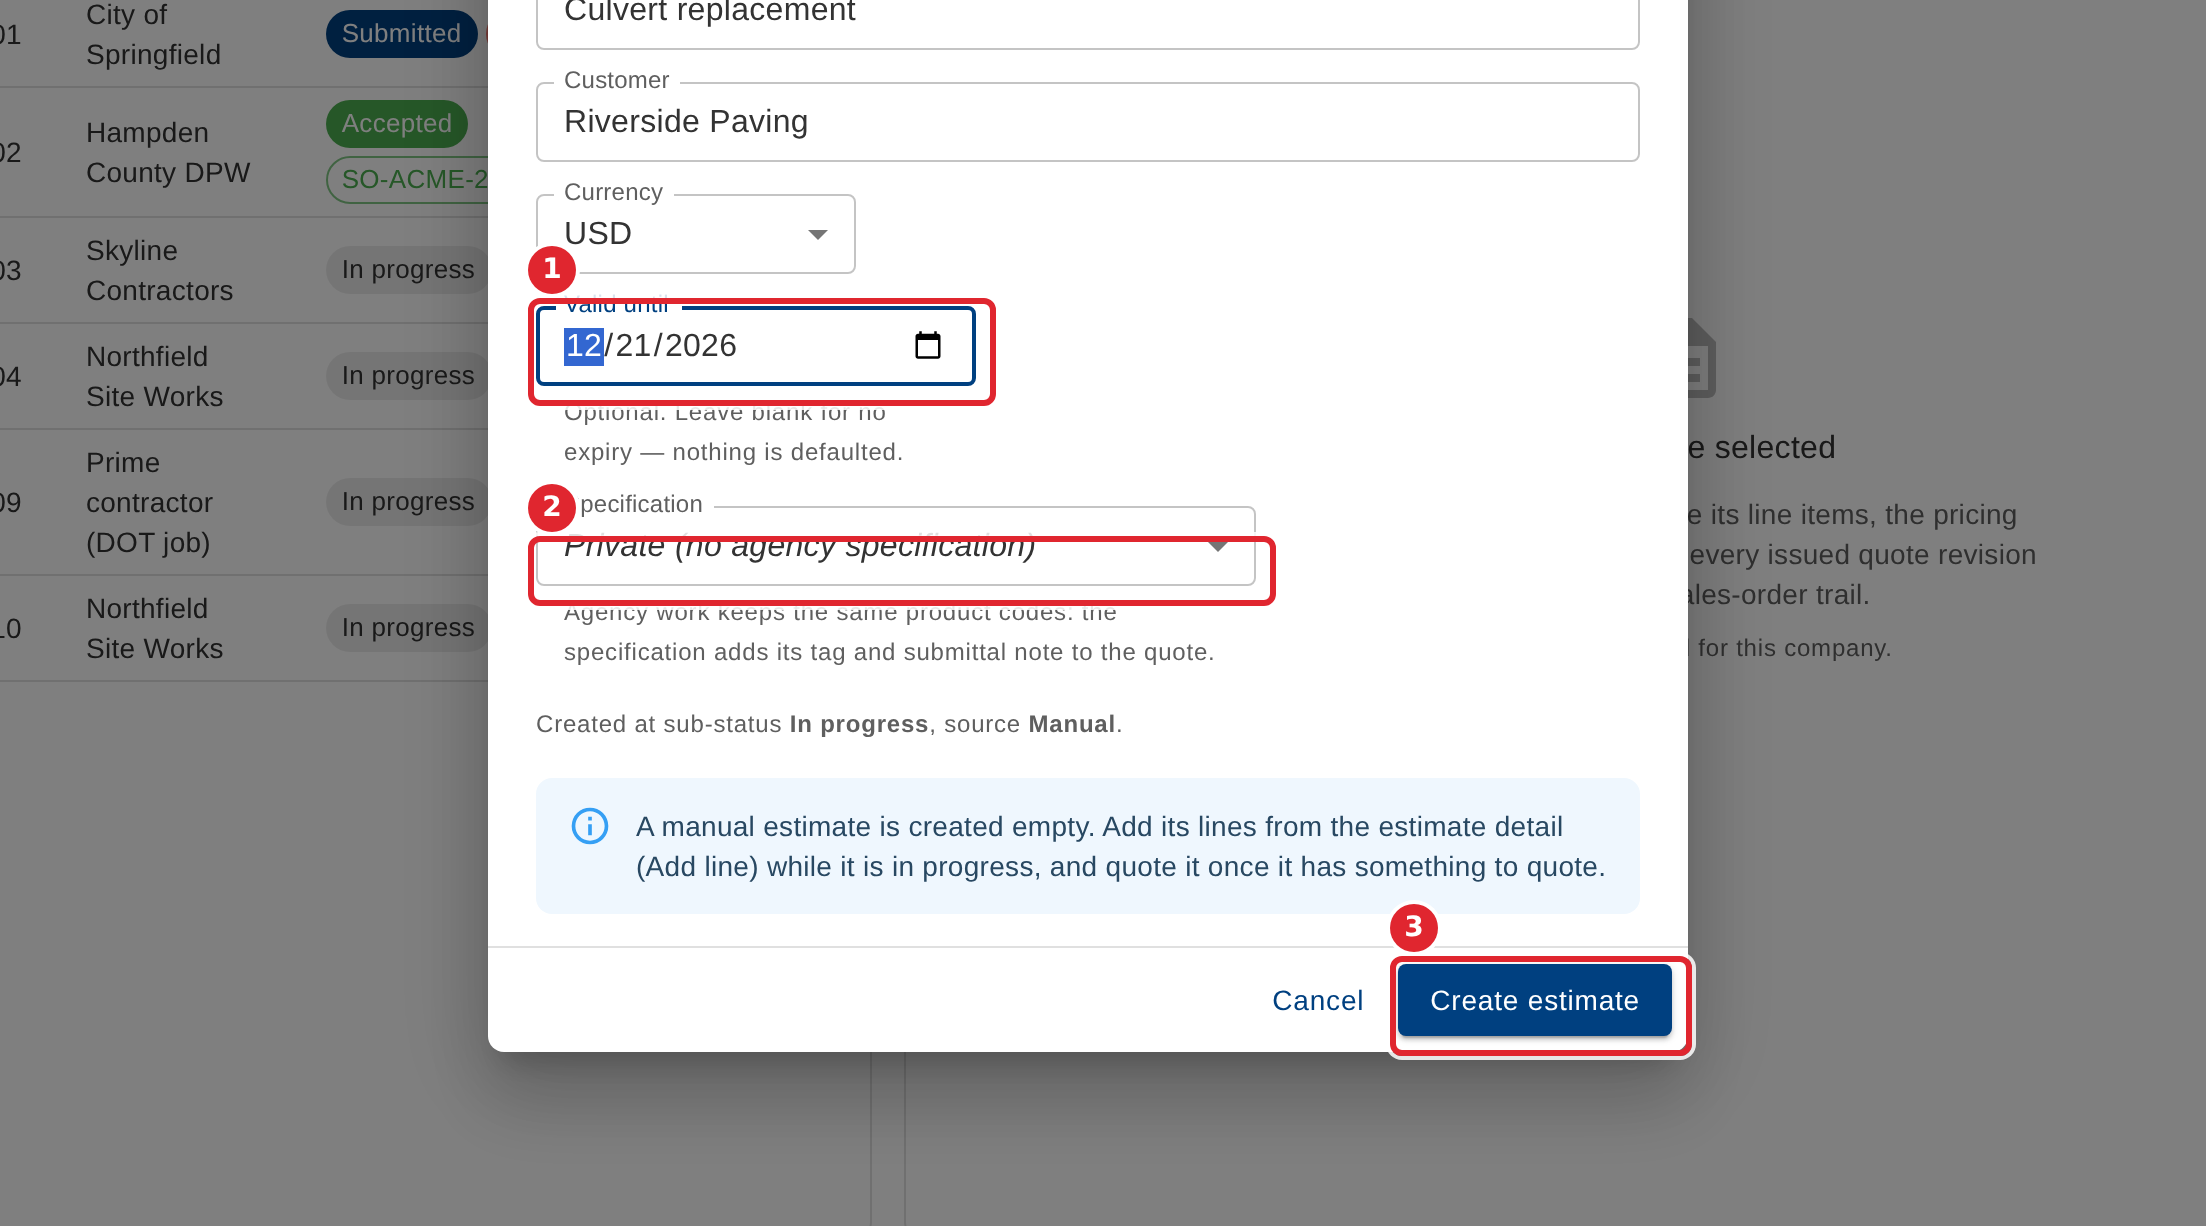
Set Valid until if the quote should expire, and choose a specification if the job is built to one. Leave either blank for no expiry or private work. Then select Create estimate.
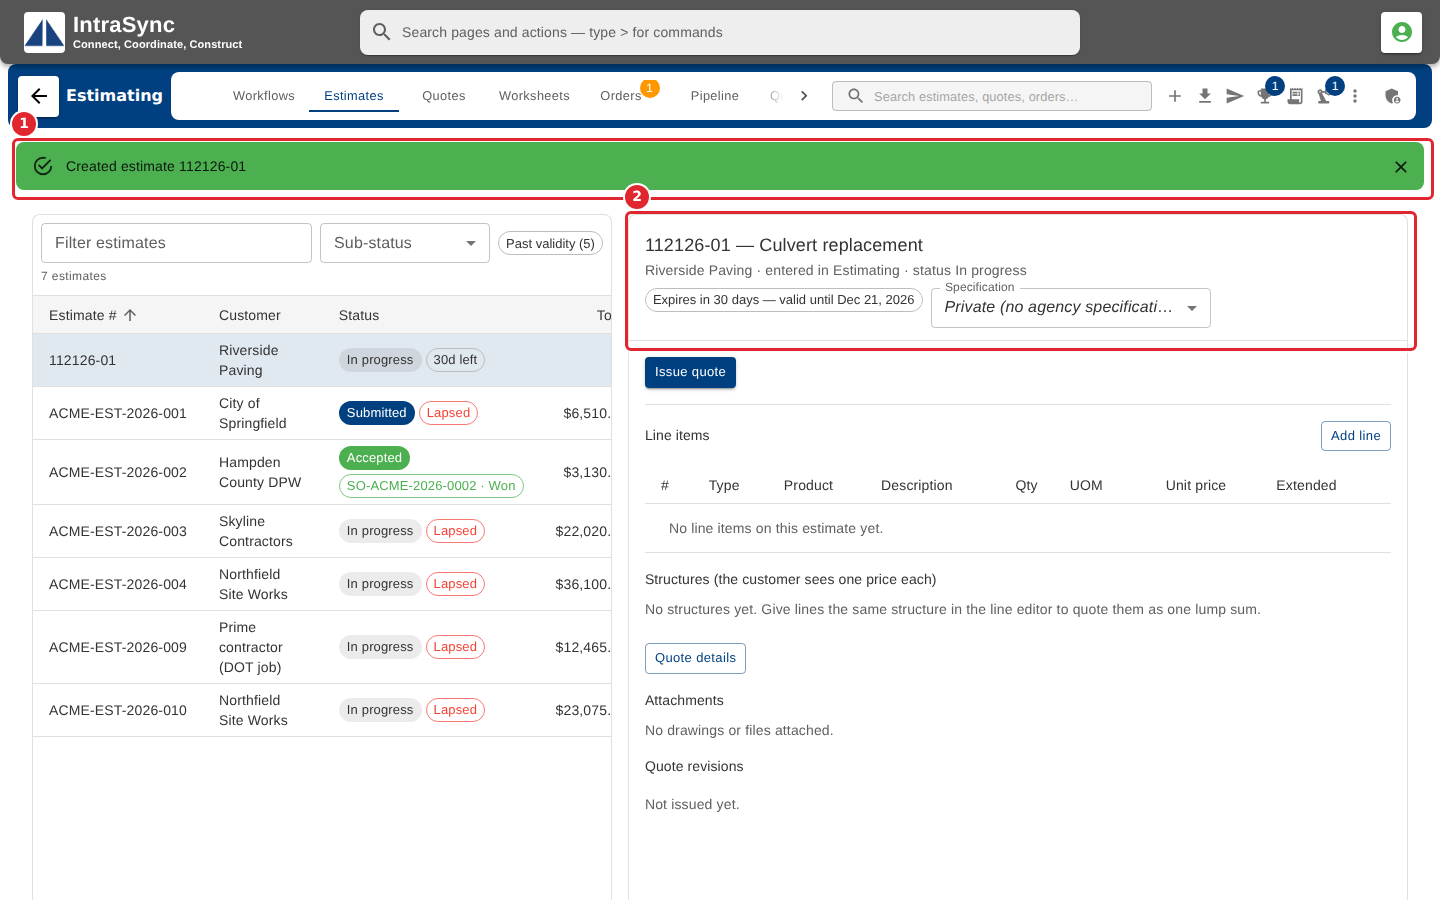
A message confirms the new estimate. Select it in the list: it starts at In progress, with no lines yet, and its validity shows beside the title.
Tips
- An estimate number you type is kept, unless it is in the day's quote-number format and already taken: then it moves to the next free number.
- Valid until is never filled in for you. Leave it blank for a quote with no expiry.
- A new estimate starts at In progress with no lines. Add its lines before you issue a quote.