Issue a quote
Send the customer a priced estimate as a new quote revision, and keep a permanent record of exactly what was sent.
Watch this in the video (0:27)
Before you start
- The estimate must be In progress, Revised or Submitted.
Steps
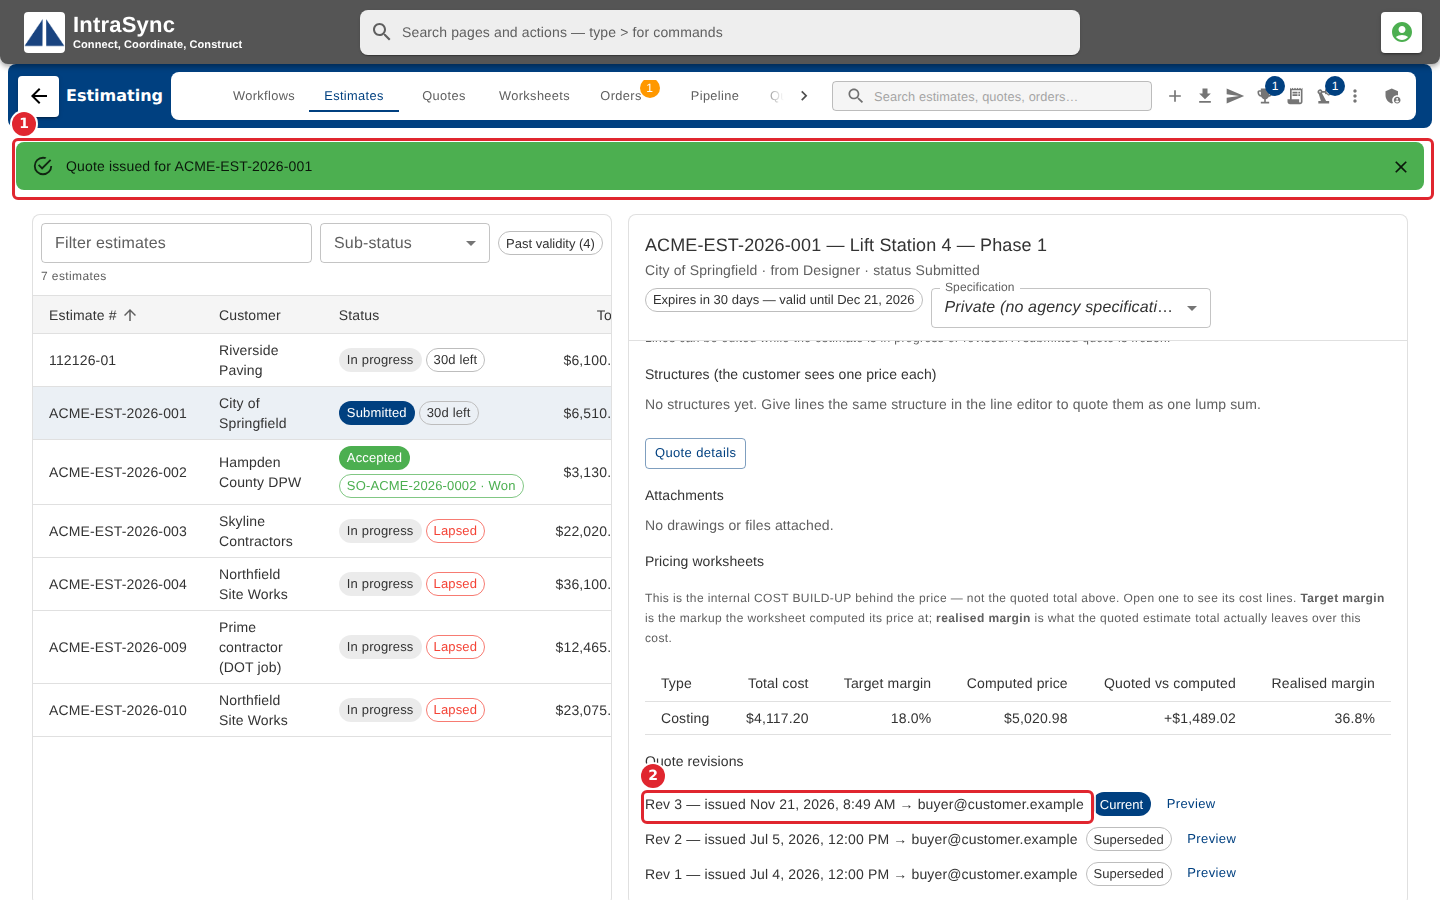
In the pictures, a numbered red box marks where to click or type. Where a picture has more than one box, the numbers give the order.
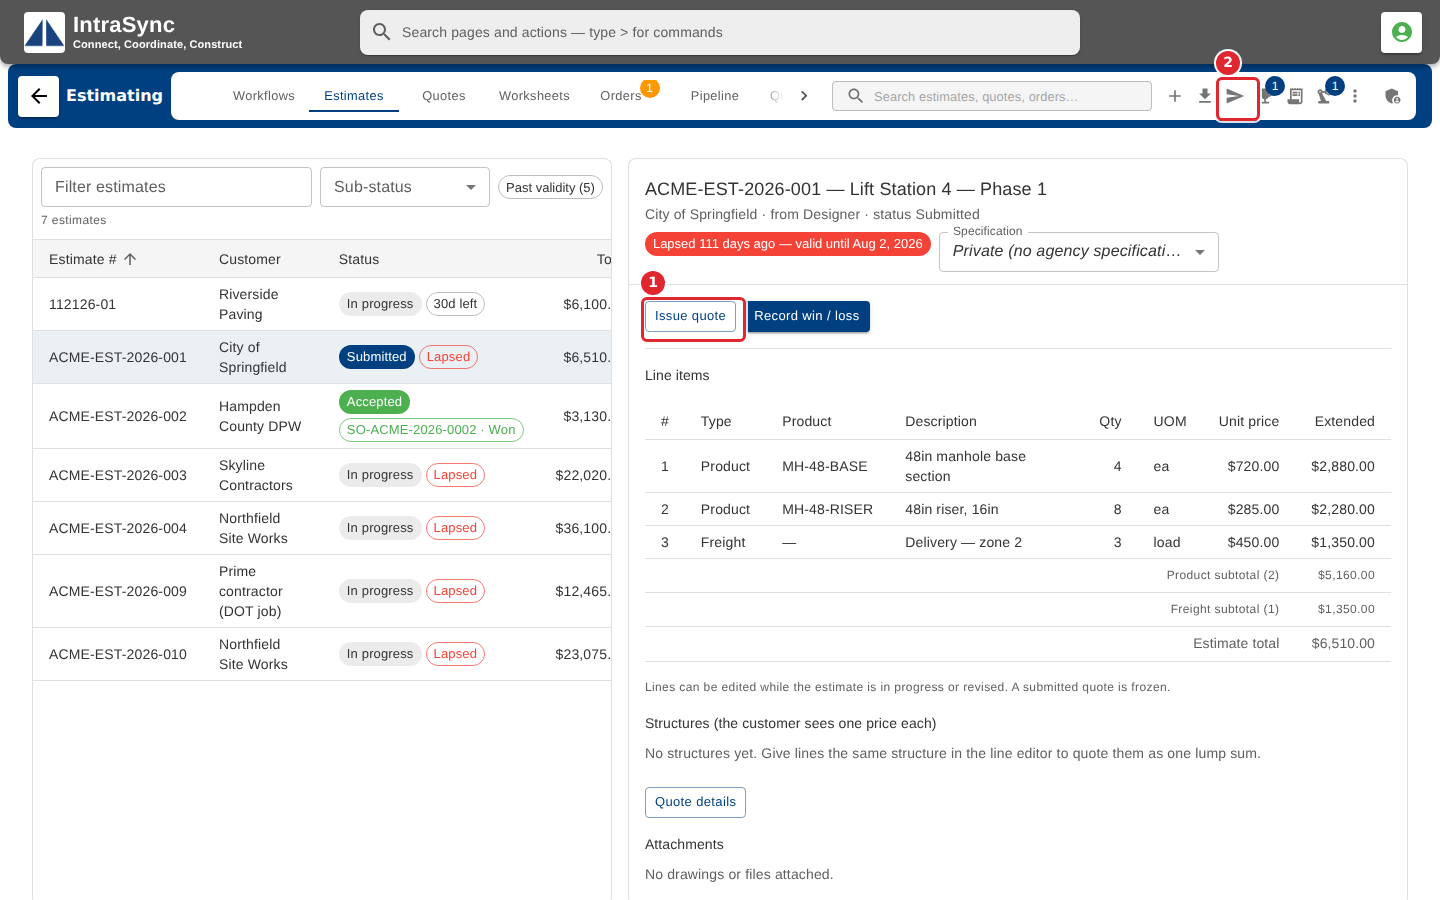
Open the estimate and select Issue quote, on the estimate or in the hub header.
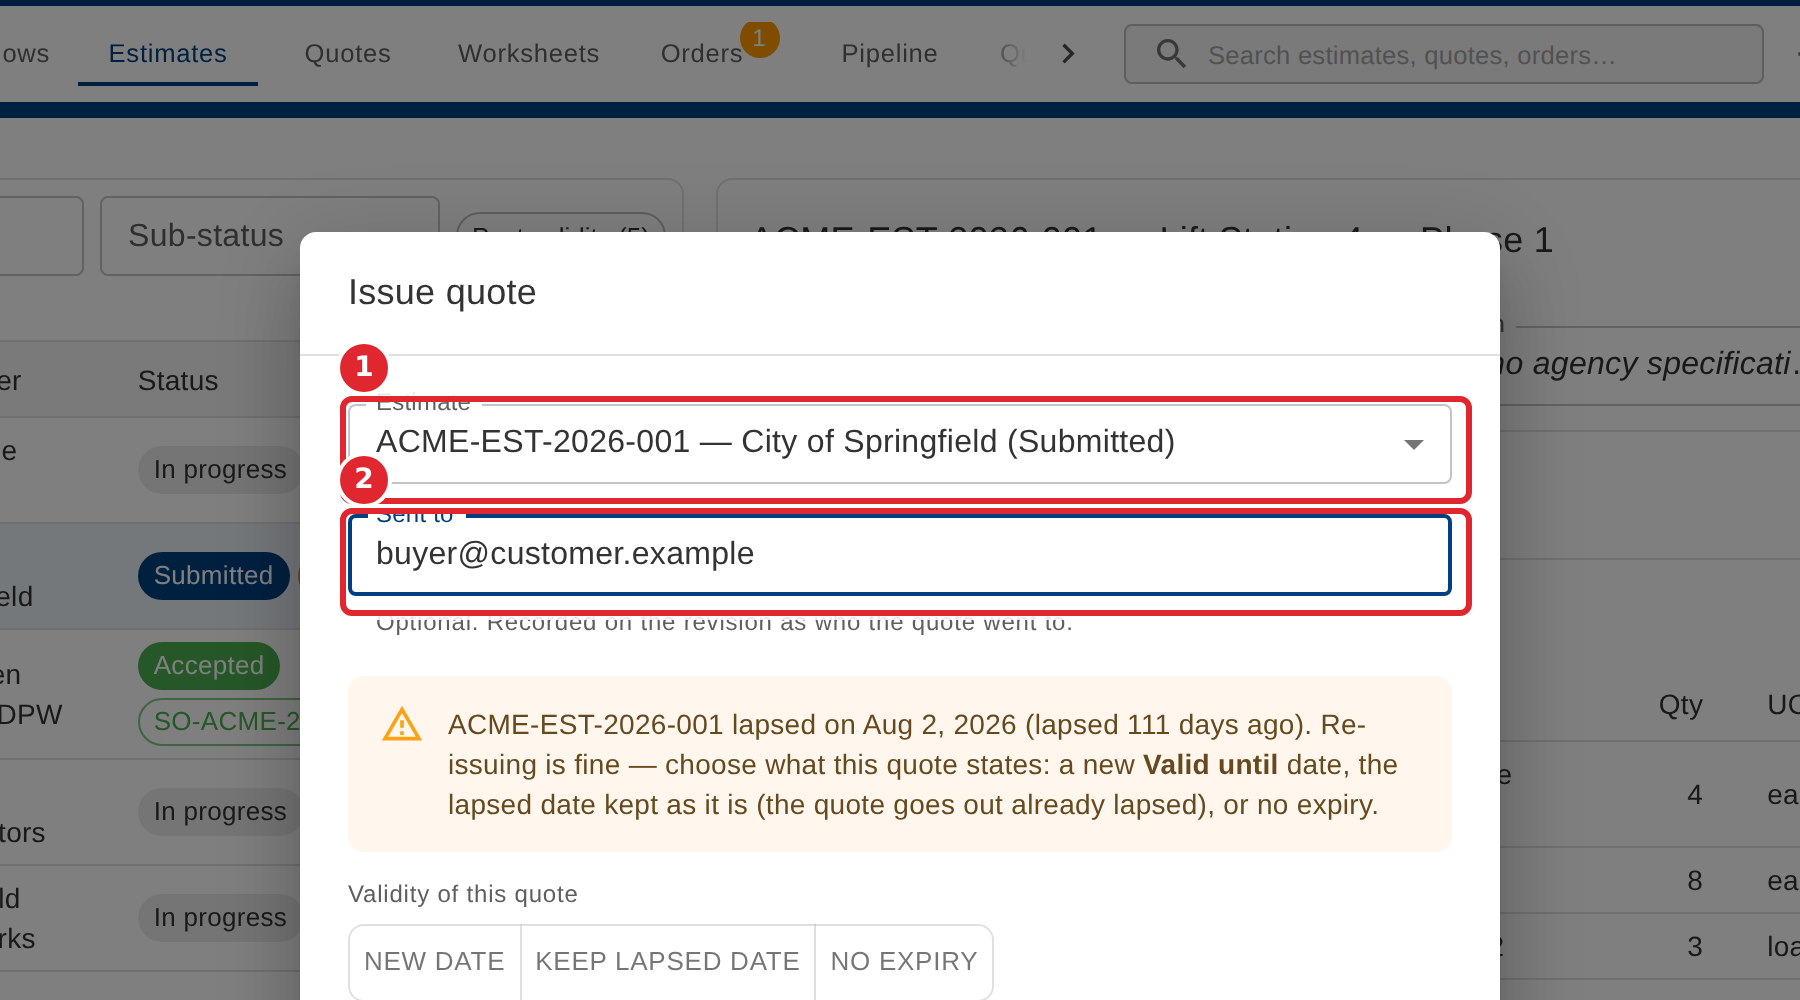
Check the estimate, and type the email address the quote is going to in Sent to. It is recorded on the revision.
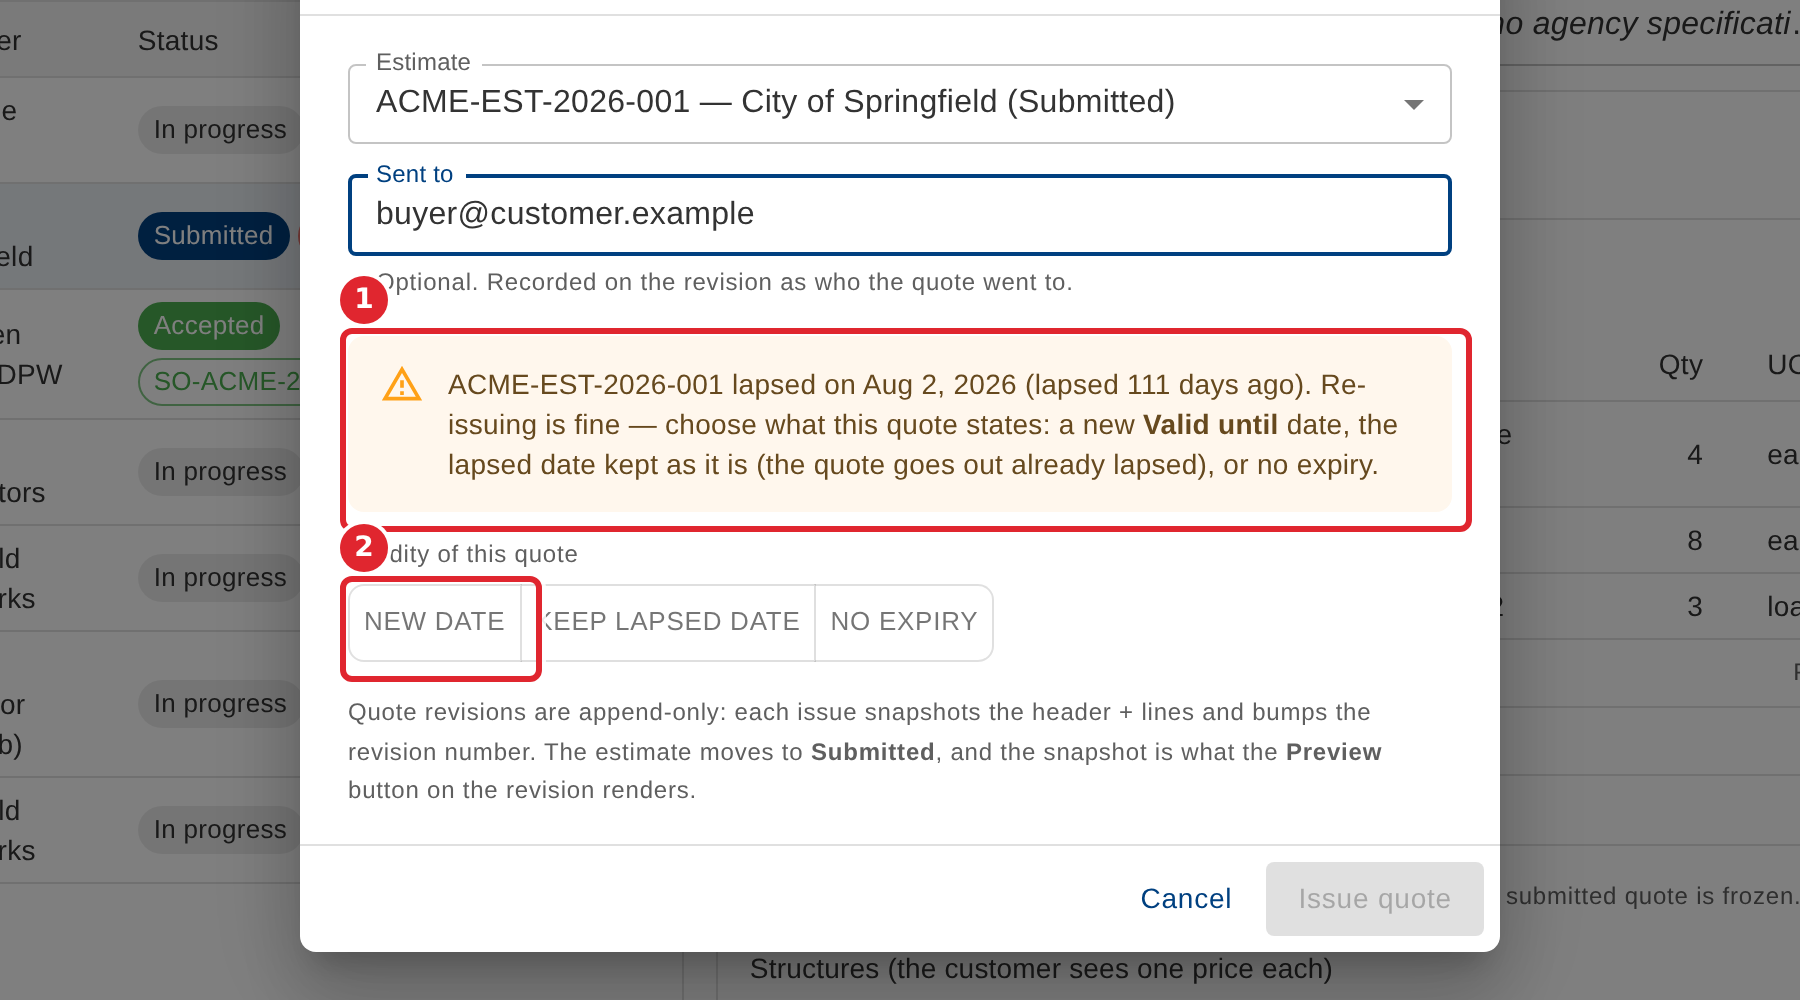
If the estimate's validity has lapsed, choose what this quote states: a New date, the lapsed date kept as it is, or No expiry. The quote is held until you choose.
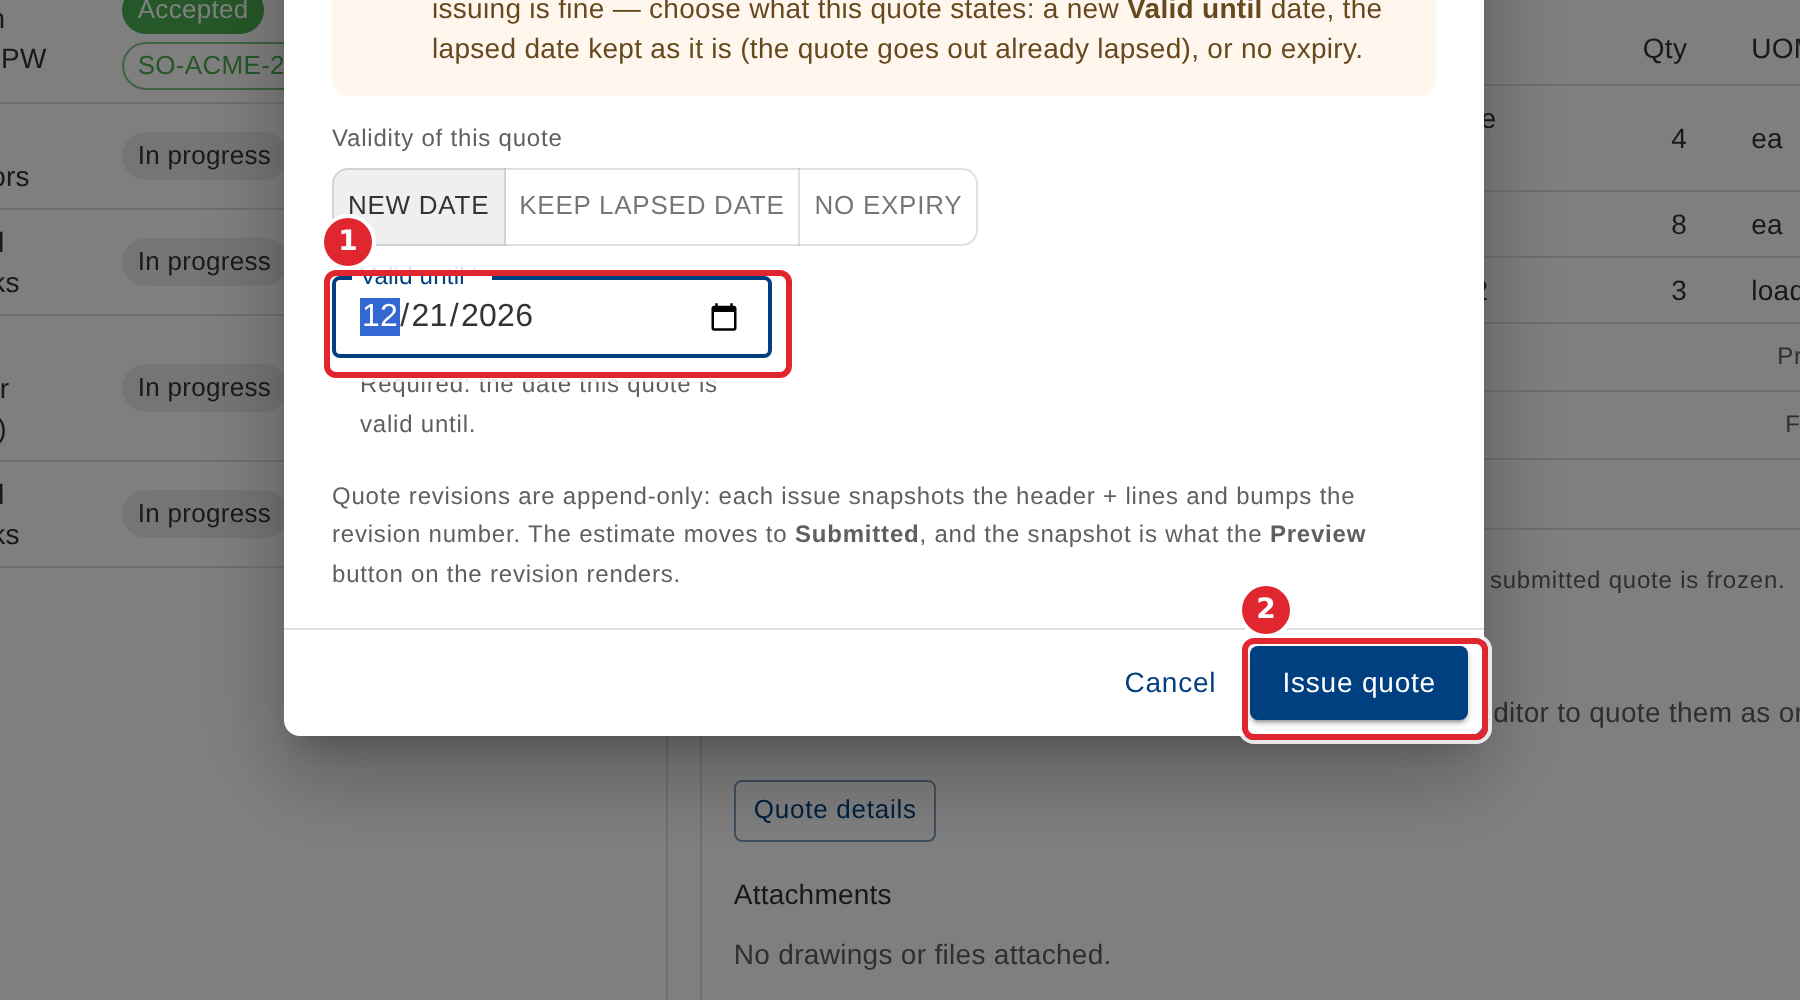
With New date, enter the Valid until date, then select Issue quote.
A message confirms the quote was issued. The new revision is added to Quote revisions, and the estimate moves to Submitted.
Tips
- Sent to must look like an email address; it is recorded on the revision for good.
- A Valid until date already in the past is allowed, but the dialog warns that the quote would go out already lapsed.
- Each issue adds a revision and moves the estimate to Submitted. Earlier revisions are never changed.