Project Management guide · section 13 of 20
Raise and decide a change order
Record changes to the work with their cost and schedule impact, and approve or reject them.
Watch this in the video (1:02)
Before you start
- A project is in scope, or choose the project in the form.
Steps
In the pictures, a numbered red box marks where to click or type. Where a picture has more than one box, the numbers give the order.
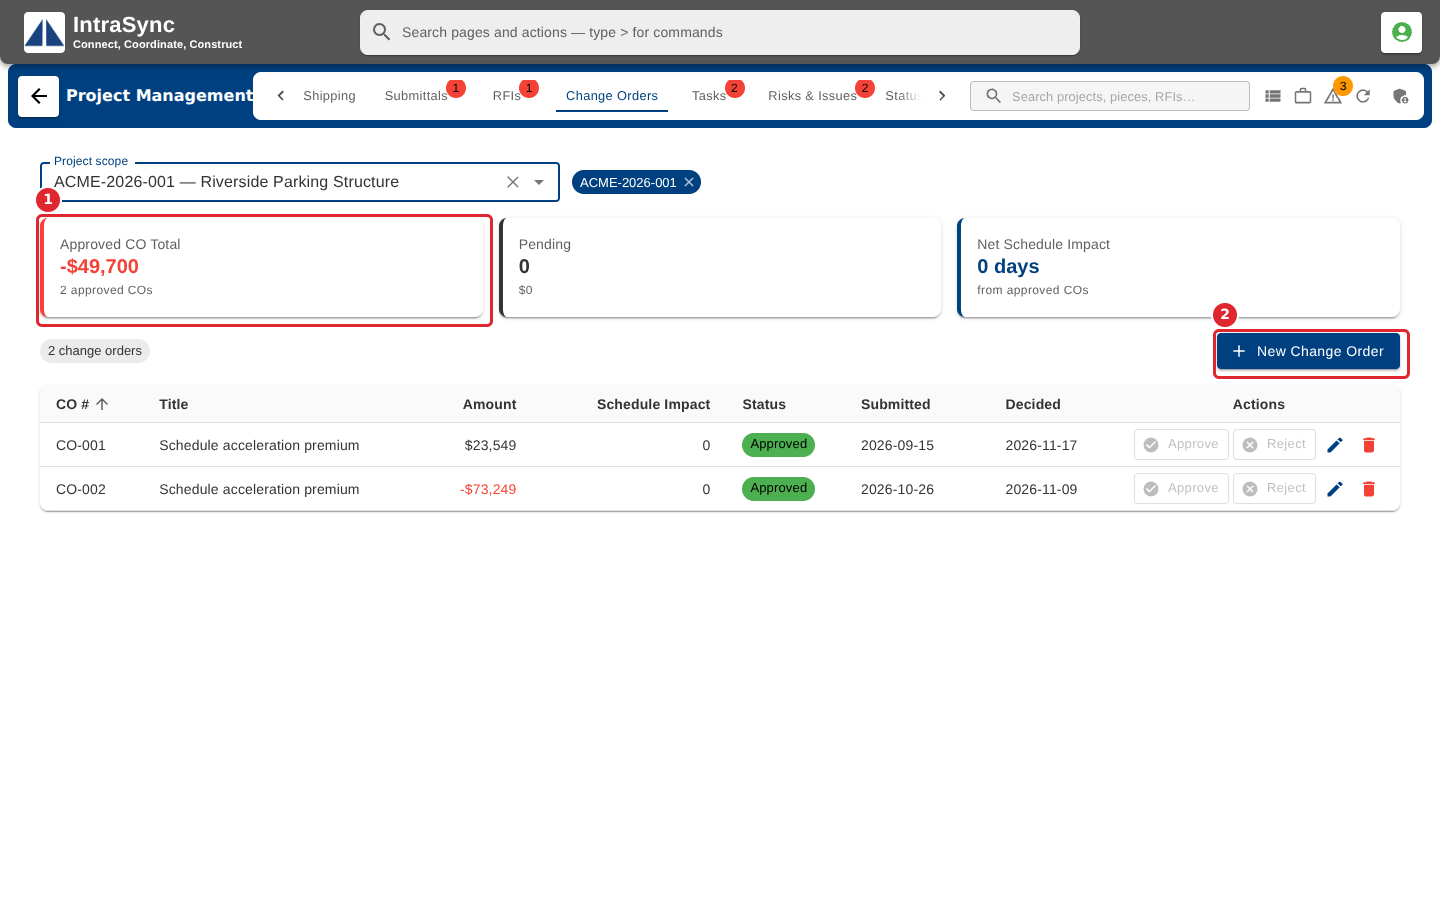
Open the Change Orders tab. The cards total the approved change orders, the pending ones and the net schedule impact. Select New Change Order.
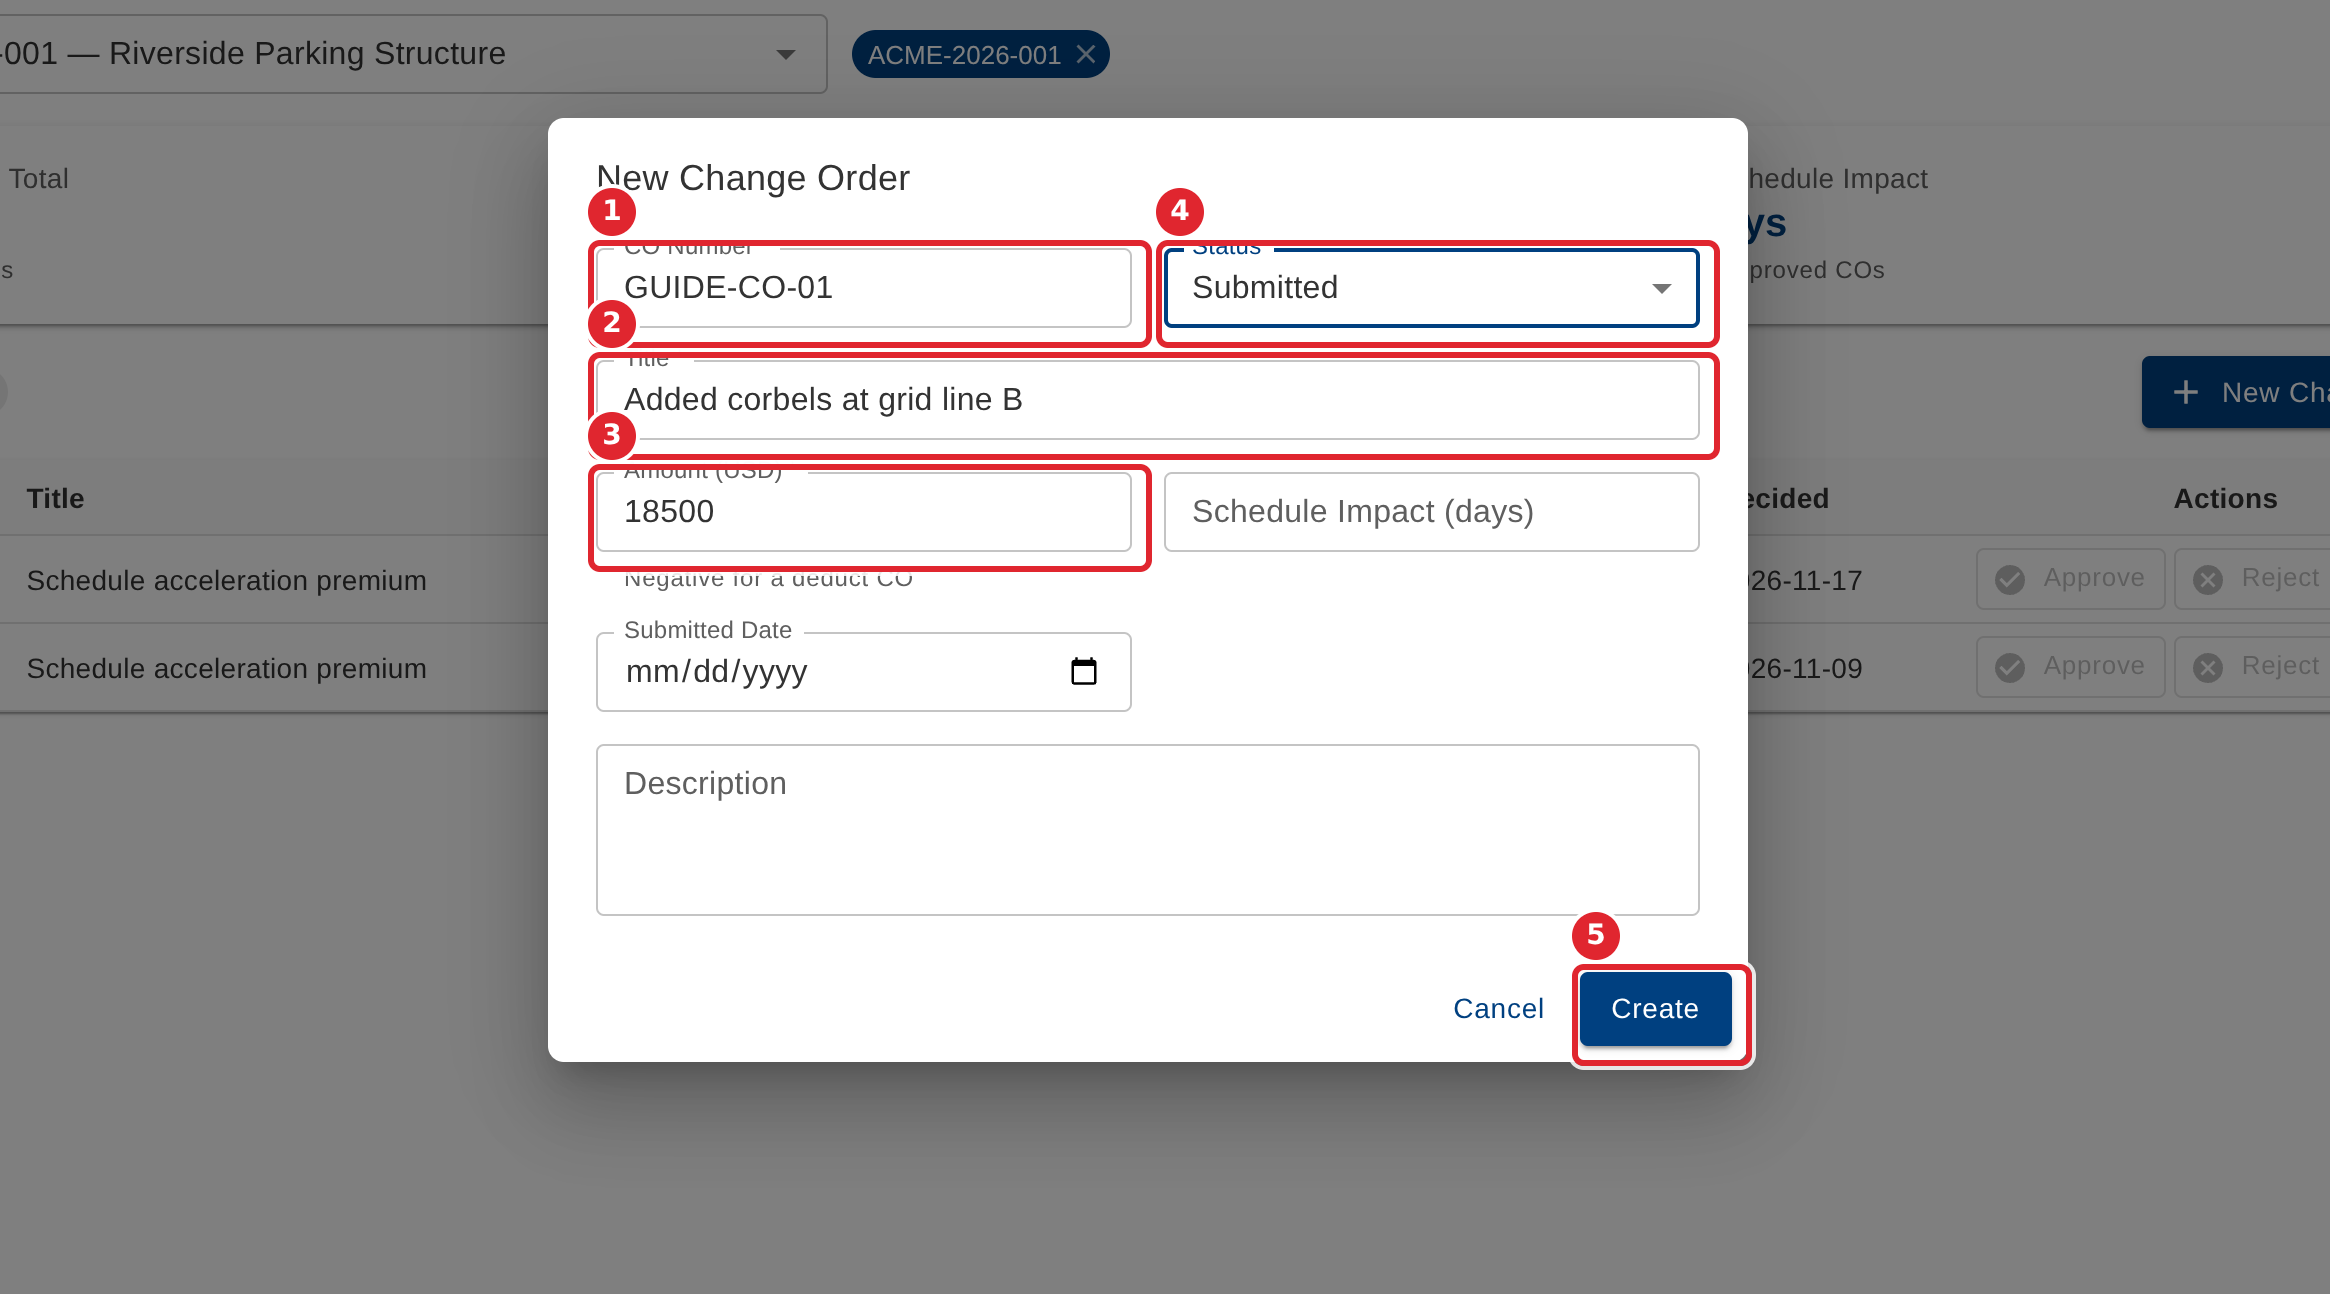
Enter the CO Number, the Title and the Amount (all required; a negative amount is a deduct), the Status and any schedule impact in days. Select Create.
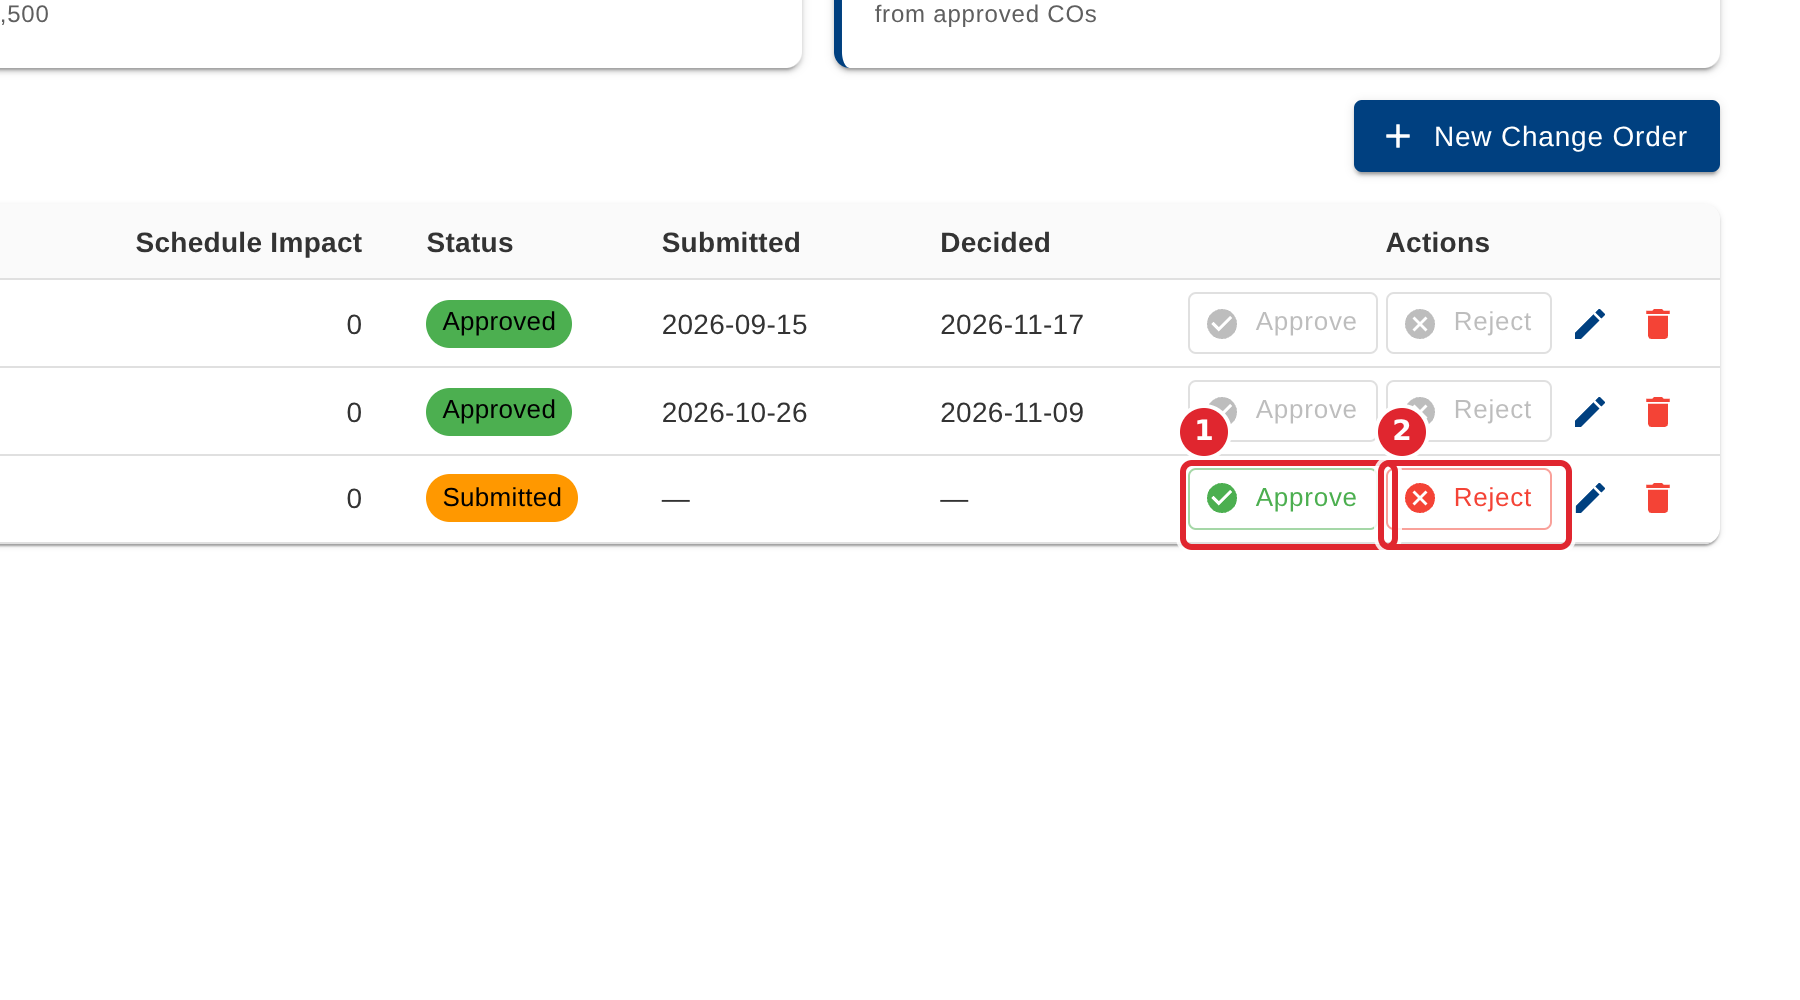
A submitted change order can be decided: select Approve or Reject on its row.
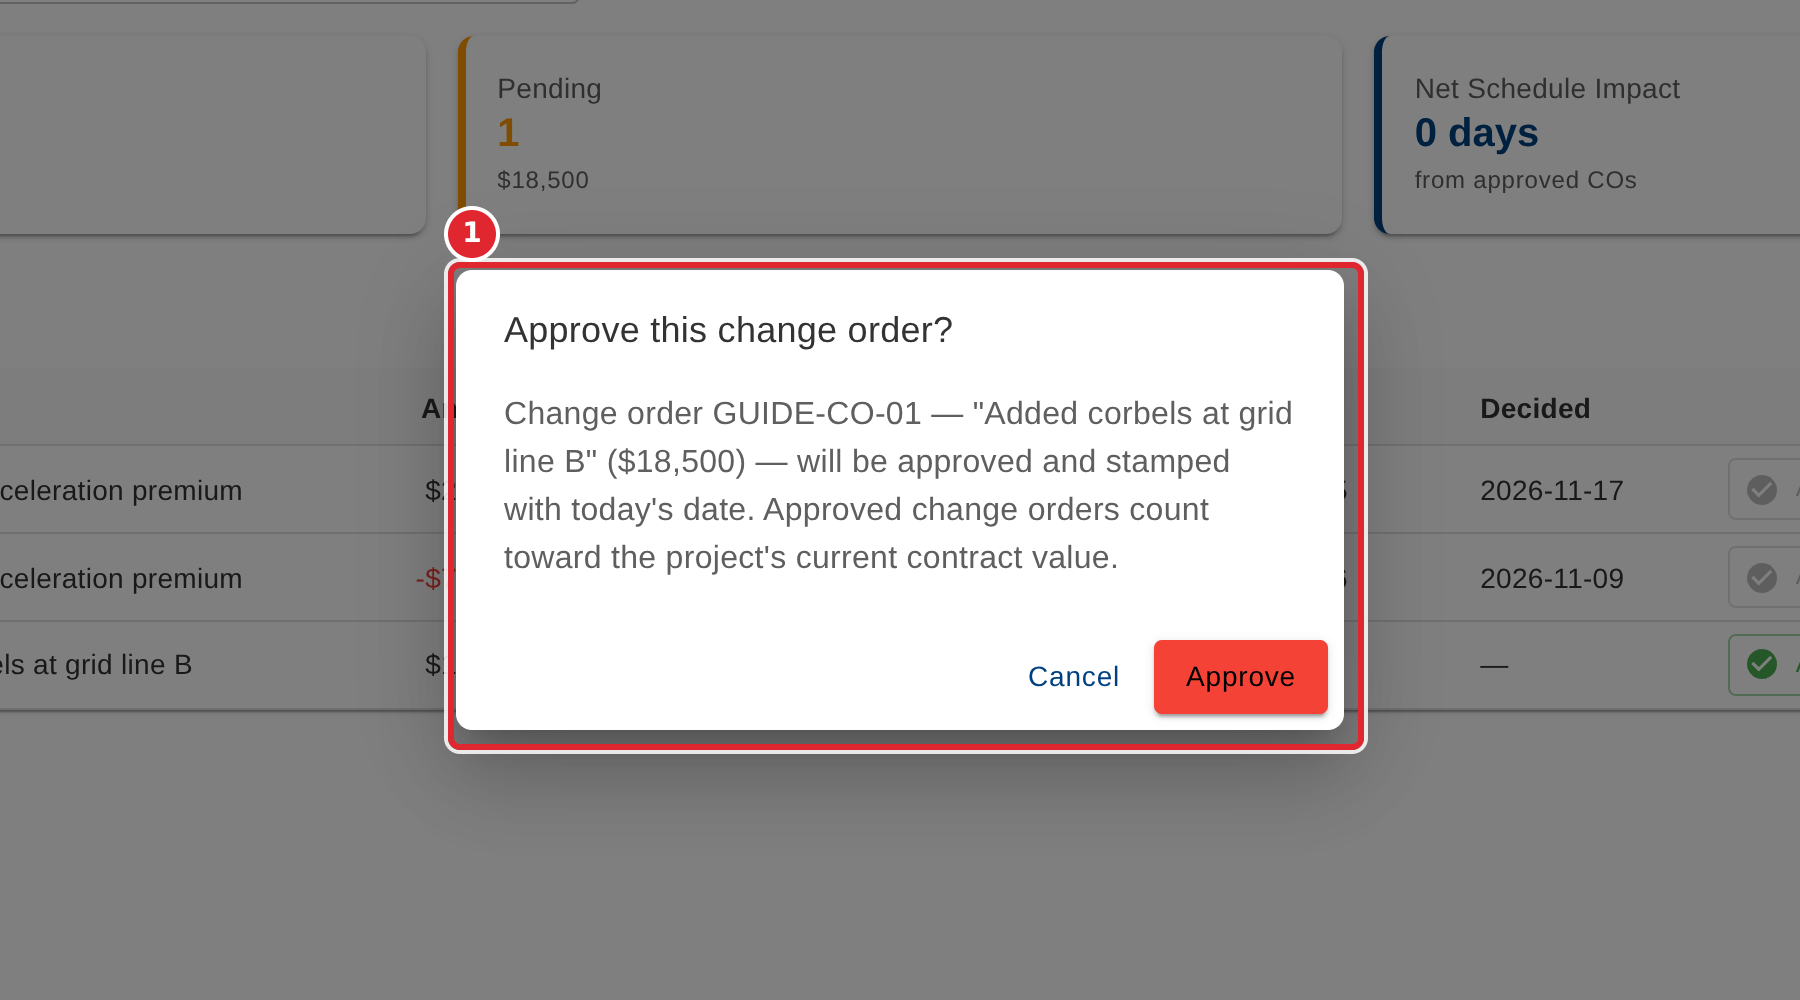
Confirm. The decision is dated today, and an approved amount moves into the project's current contract.
Tips
- CO Number, Title and Amount are required. Enter a negative amount for a deduct.
- Only a submitted change order can be approved or rejected.
- Approved change orders add up into the project's Approved CO Total and its current contract.